
Create a "trunk" Inspired Look for a Nightstand
Read on to see how a discarded nightstand transformed to a "trunk" look for a theme room.
Time: 6 Hours Cost: $75 Difficulty: Easy
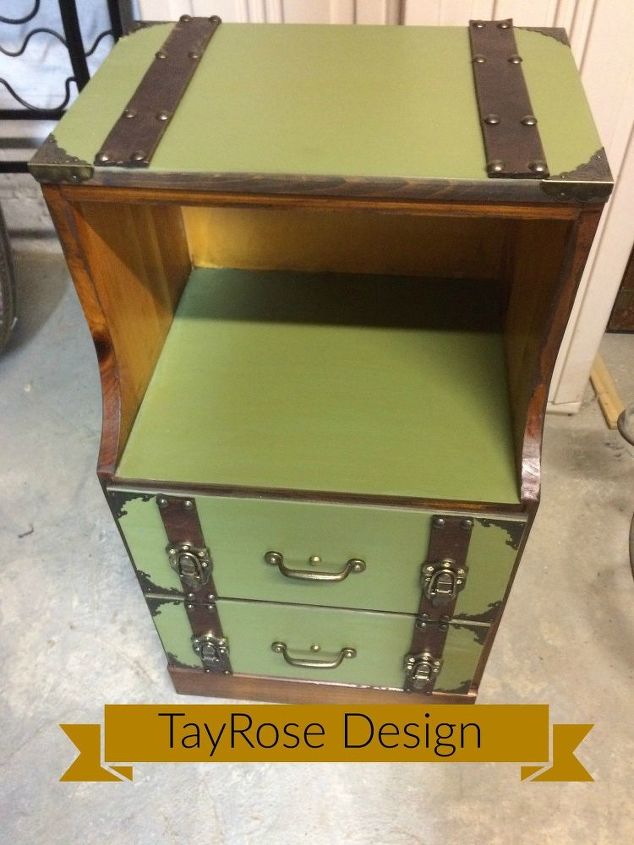
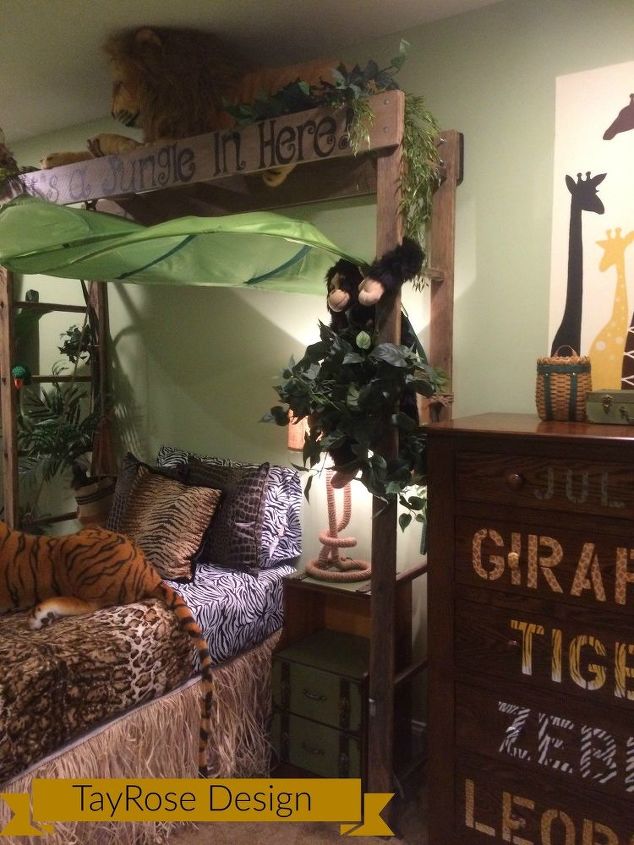
My client had asked for a nightstand for a jungle theme room I was doing for their little girl. I wanted to choose something that still had a feeling of traveling the ocean seas towards jungle paradise. So, I checked out my furniture stash of odds and ends pieces I've collected for future transformations on projects that come my way, and I found the perfect size night stand that had a drawer which my client had requested and room on top for a lamp and maybe even a book.
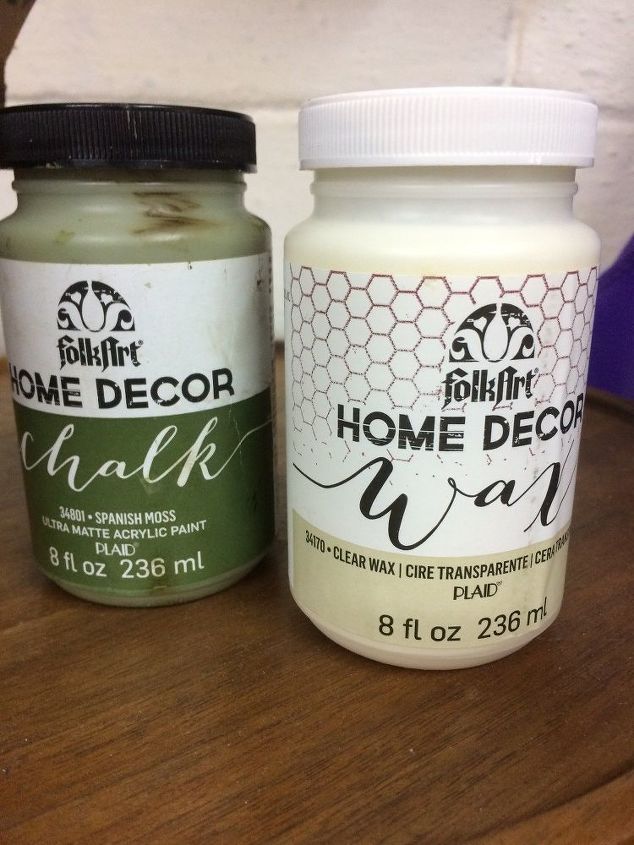
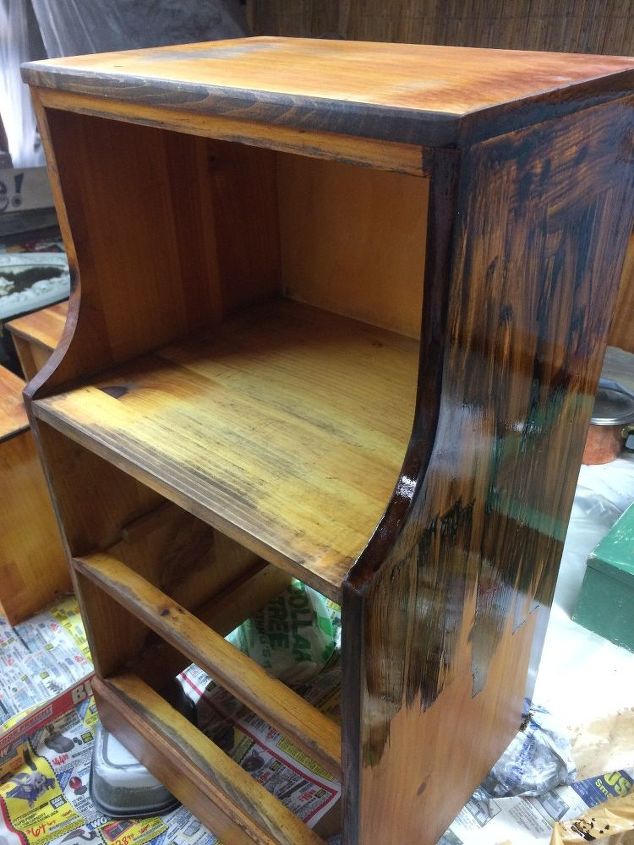
However, in its current color it would not work with the design. I kept thinking about travel and how I might be able to simulate the look of a trunk or suitcase for this furniture piece. I knew the orangey colored stain color was not going to work, so by using a palm sander and sand paper by hand, I sanded down to practically the raw color on the sides and front frame work so I could stain it a darker brown. I wanted to bring in some jungle green color and I thought that chalk paint would be great choice for it covers just about anything with little prep. I chose Spanish Moss chalk color from JoAnn Fabrics Folk Art series and I also picked up their clear wax as well to go over the paint to seal and protect the color.
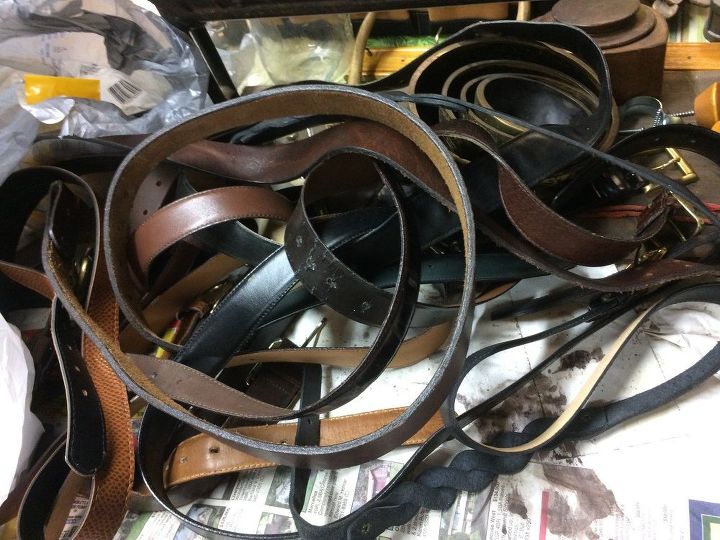
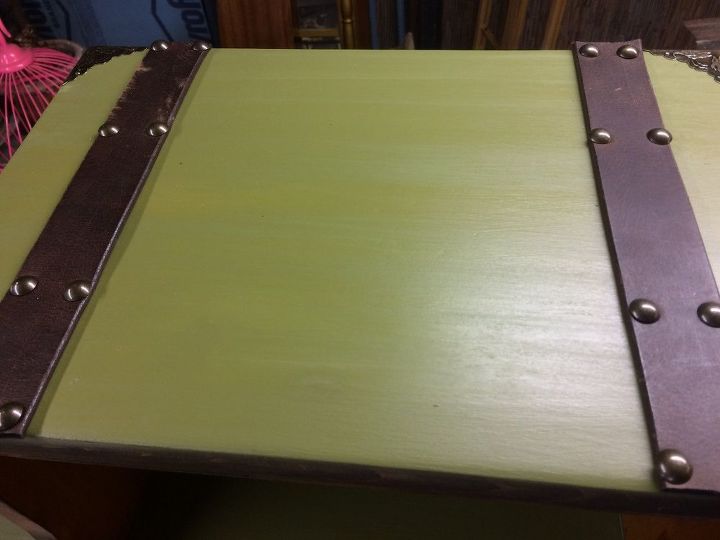
I also wanted to add details to my "trunk" so my inspiration came from age old steamer trunks that had wonderful leather straps and metal hardware. I haunted the local thrift stores for leather belts and picked out a few that I could cut up and apply with upholstery nails into the wood.
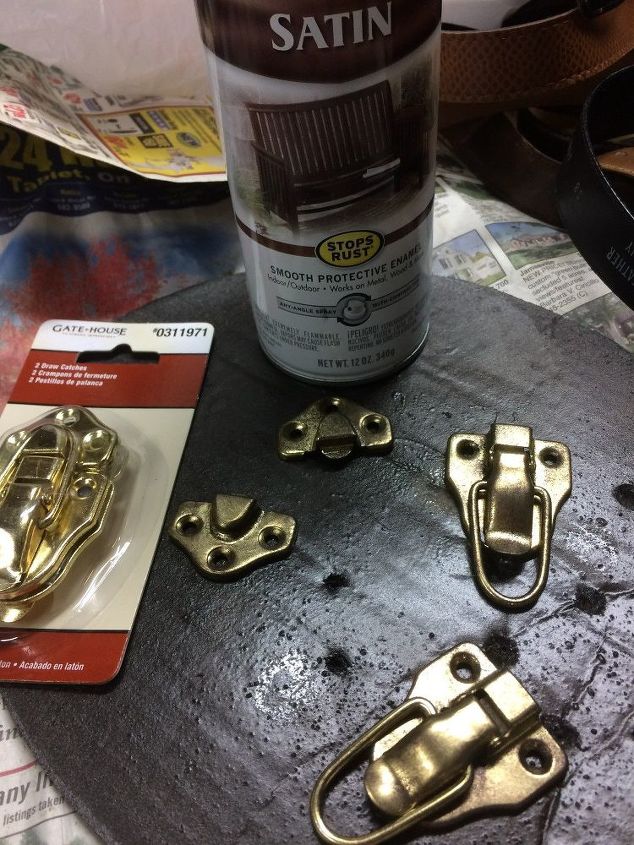
For metal accents, I found at Hobby Lobby perfect corner pieces that came with their own tiny nails to tap into the corners of the top and drawers. For the front, I found at Lowes some brass cabinet latches that I could use that simulate trunk latches. The latches were a little too bright brass in color, so I sprayed on some brown paint and dabbed off with a rag to give more of an antiqued look. Now I was ready to start the staining and painting.......
I removed the drawers and sanded the fronts lightly for they were to be painted, then sanded the sides of the stand, the edges and inside the opening, then wiped down with a tacky cloth to remove sand dust. I had some leftover dark walnut stain from another project that I brushed on to the sides, edges and inside of the opening shelf then wiped off with a cloth to the desired color. I think I applied the stain twice after letting the first coat dry per can instructions.
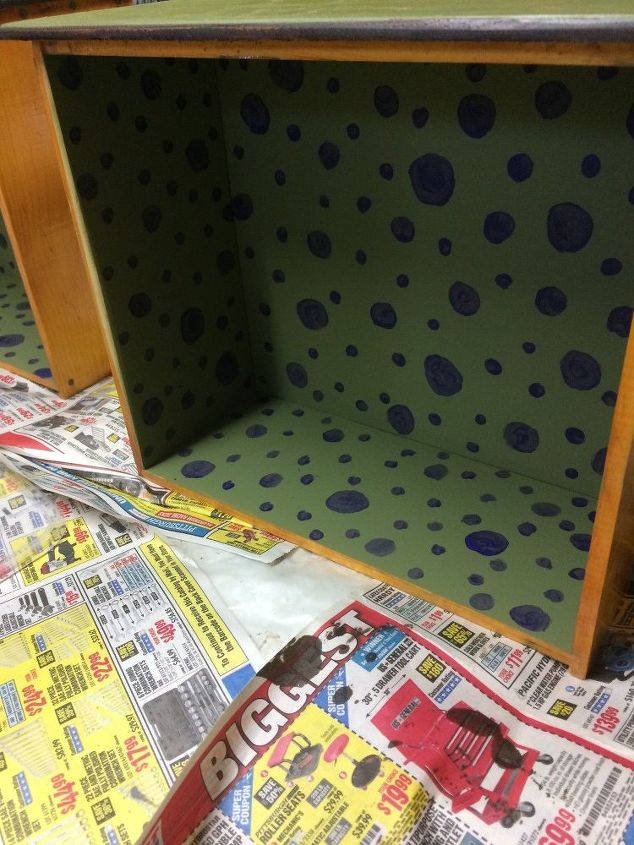
I decided to paint the inside of the drawers in the Spanish Moss green chalk paint and since the little girl loved purple and polka dots, I thought having a surprise when the drawer opened would be a fun addition.
The top of the stand and the drawer fronts all got painted with the Spanish Moss and I applied 2 coats and only needed 1 jar, so the paint really goes a long way. After paint had dried I applied the clear wax over the painted surfaces according to jar instructions which was really easy and let dry. Over the stained areas I wiped on a poly with a cloth and let it dry as well.
I measured and cut the leather belts to fit down the top in 2 rows and down the front of the drawers as if the leather strap was one continuous strap. I used gorilla glue as well as upholstery nails to adhere cut straps to surfaces. For the latches, I placed the latch where I wanted to screw it down, then marked holes with a pen and started the hole with a small drill bit and screwed latch in place. I nailed the corner pieces to the top and drawer edges with the tiny nails included in the packages and then came the handles.
The original drawers had a wood knob right in the center and I wanted to have a handle. So, I needed to deal somehow with the hole in the center of the drawer. I could have tried to plug it with putty, but the drawer front was quite thick and it would take a lot of putty and challenging to get load it up into the smallish hole. I could have found a wood dowel to glue into hole then cut off, sand and then paint over too, but I just decided to use the hole rather than hide the hole. I found at Lowes the perfect length brass bolt with a rounded head that fit through the drawer and had a brass small nut on the other side...done. I lined up the handles and screwed them on the front.
I loved the way this little night stand turned out. Plenty of space for her to store her books, a reading lamp on top and her secret treasures tucked inside the dotted drawers. It feels great to transform a simple piece of furniture that may have been set aside for awhile, to a new usable piece with a new look that now fits in again!
No comments