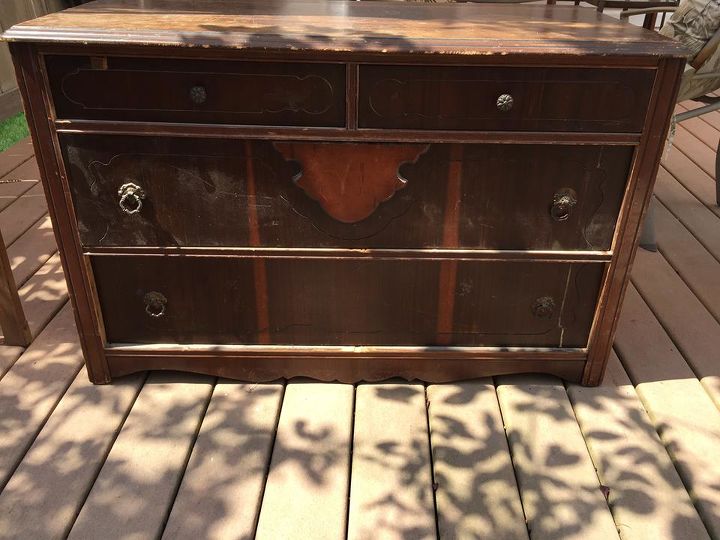
Vintage Dresser Was Missing Legs
This dresser literally didn't have a leg to stand on! My favorite part of this project was trying a quick and easy method to paint the white details which I will share with you below. But first the repairs. . .
The first step was to add some legs. I found some at Lowe's that I thought would work with the style of the dresser. But it did require some nut sleeves to be added in order to attach the legs. That took some trial and error to get it so the legs were sturdy enough to hold the weight of the dresser. Long story short, my husband had to drill a hole to counter sink the sleeves and then added 4 screws to add even more stability to the sleeve.
Next I added some wood glue to the legs, screwed them in, and then let the weight of the dresser sit on the legs while the glue dried. It's solid as a rock now. I rounded the corners of the legs with a sander to blend in with the new legs.
I decided to try a new method on this project which I am excited to share with you. First I painted two quick coats of Old White into the grooves. I didn't worry about being overly precise. Then I took a damp washcloth and wiped away the excess paint. Easy-peasy.
I repeated the same process on the drawers.
And now for the big reveal of my secret weapon for the project -- Sculpey clay! Since the clay doesn't dry out until it's baked I was hoping it would work for this project.
After the paint was dry, I pressed the clay into the grooves and then used my fingers to wipe off any extra clay.
Next I painted Duck Egg Blue (Annie Sloan Chalk Paint) over the entire base of the dresser and the drawers. After the paint was dry I used a Q-tip to remove the clay. The grooves in the drawers were too narrow for a Q-tip, so I used a wood skewer to remove the clay on that area. It's important to use clay that matches the color of your paint just in case any residual remains behind.
And here's the dresser with new legs and a new finish.
I painted the top in Old White and Coco and then sanded it back to a translucent finish. I distressed the remainder of the dresser and then sealed it with clear wax.
I painted the knobs in Old White and dry brushed Coco over it to coordinate with the top.
Here's one last look of the before and after.
I have a few more photos and details on my blog, so if you'd like to stop by to see this project or my other projects, I would appreciate a new visitor. :-)


No comments