
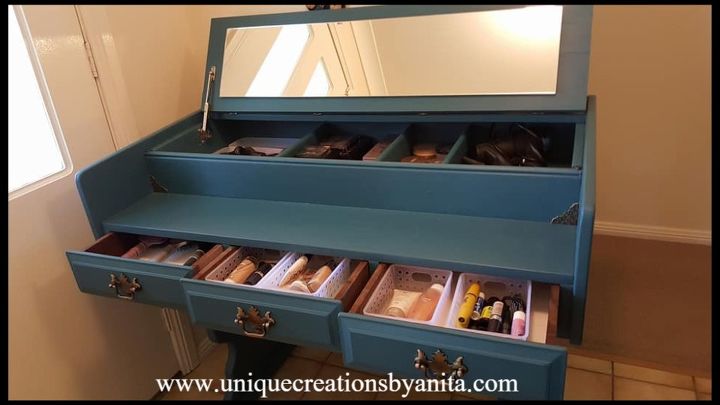
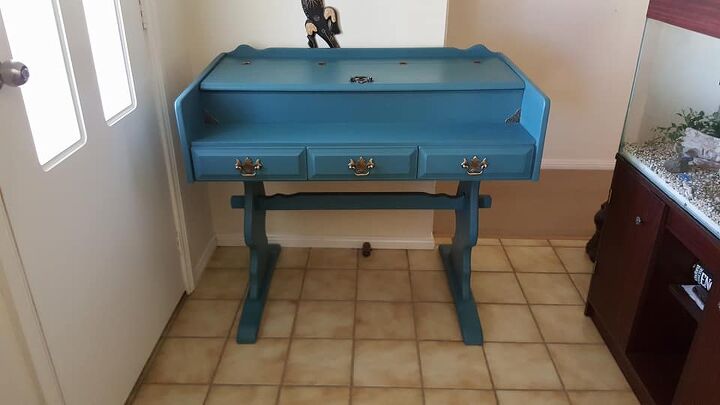
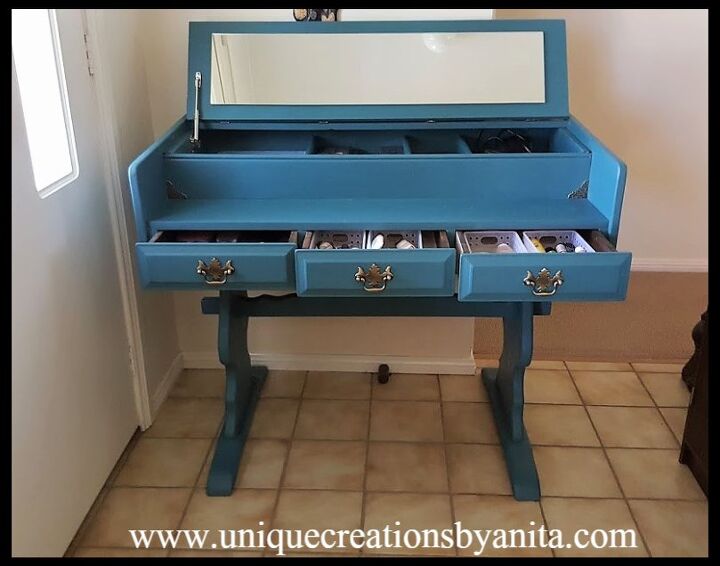
Beauty Bar/Vanity Repurposed From Old Desk
I got this old writing desk off of my local market place website. It was a bit too old-fashioned to do up and sell, so I flipped it into a modern beauty bar/vanity. Beauty bars are very popular at the moment in Australia, having a desk that stores all your beauty supplies in one place is a great idea.
Time: 1 Days Cost: $60 Difficulty: Medium
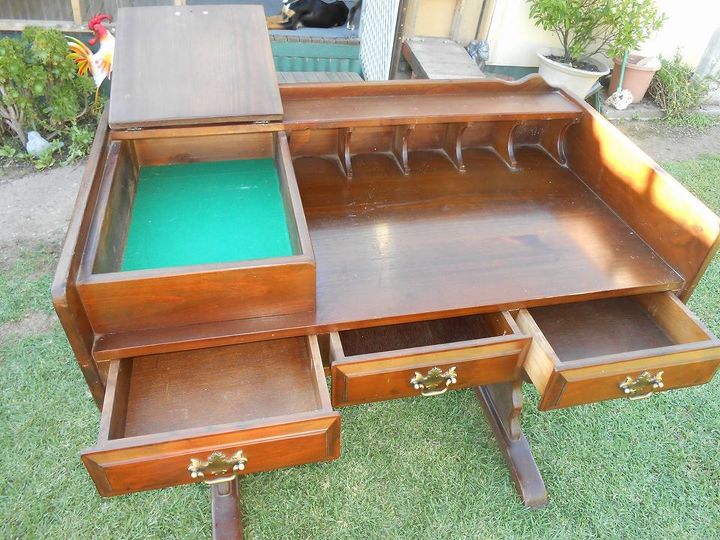
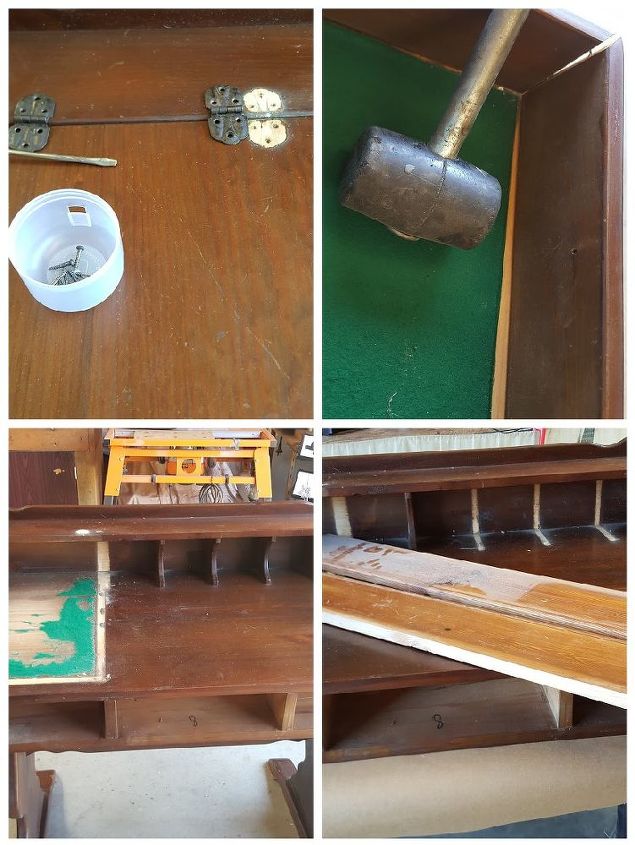
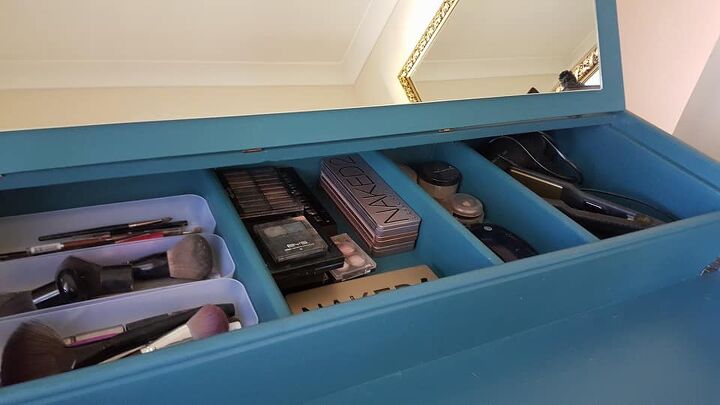
I removed all the hardware and removed the lid for the paper storage. I used a rubber mallet to gently knock out the box on the top and I also removed the little arch partitions along the back. I thought they gave the desk an old-fashioned look. I used some scraps of wood off my scrap heap to make some partitions in the desk. I put them through my thicknesser to clean them up and gave them a final sand using 240 grit sandpaper.
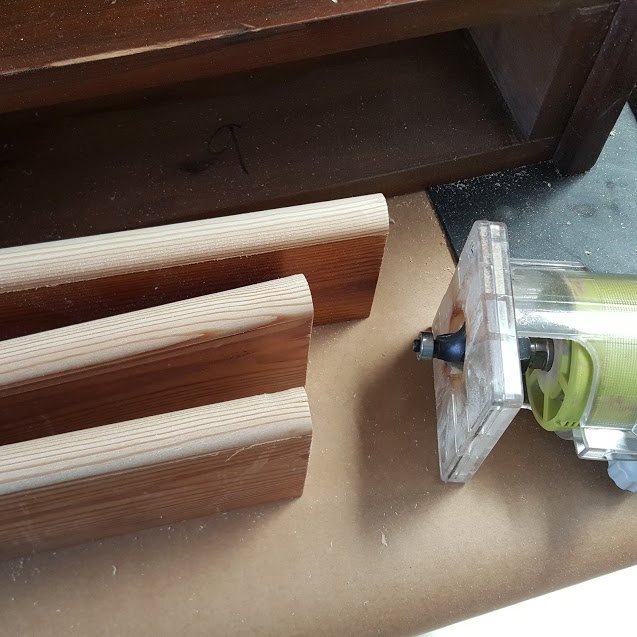
I used a router to take the corners off the tops of the partitions to give them a softer look.
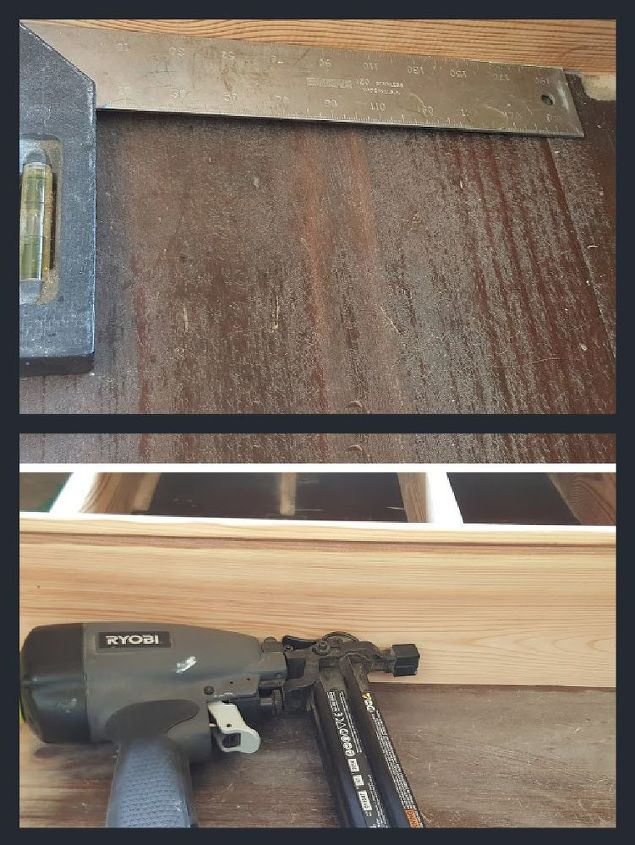
I used a square ruler to line all the shelves up, before they were permanently fixed to the desk. Note to self: sand the desk top before attaching shelves! It's so much easier and less time consuming.
To attach the partitions to the desk, I glued them first and used a nail gun to keep them in place.
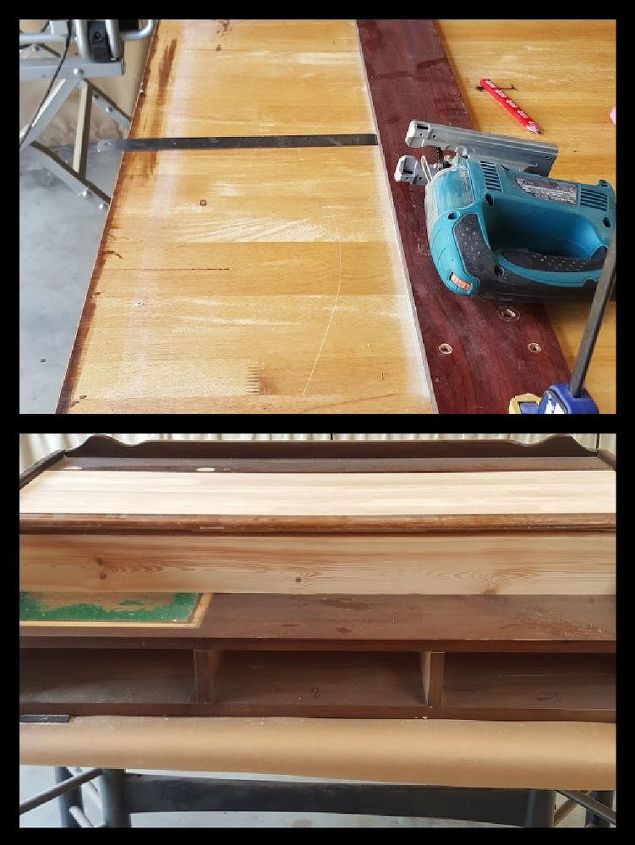
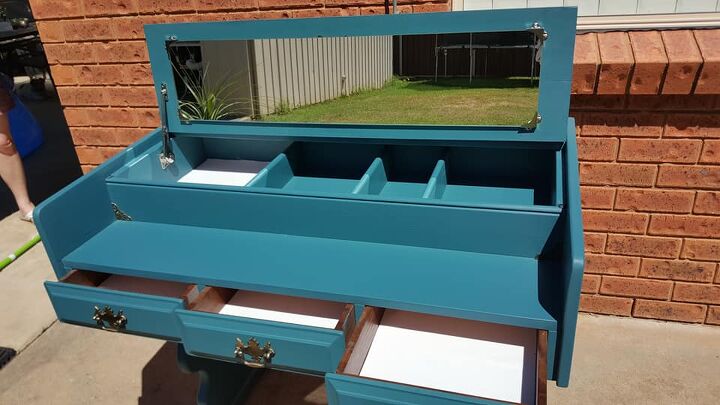
The lid was cut out from an old desk top from my scrap heap. I measured out the size I wanted, set up a plank as a guide fence, and used a jig saw to cut it. Then it took me twice as long to sand each partition.
I found in the end that I could not remove all the old felt and I decided to line the bottom with non slip mat.
I Sanded down the rest of the desk and filled in some of the damage with filler.
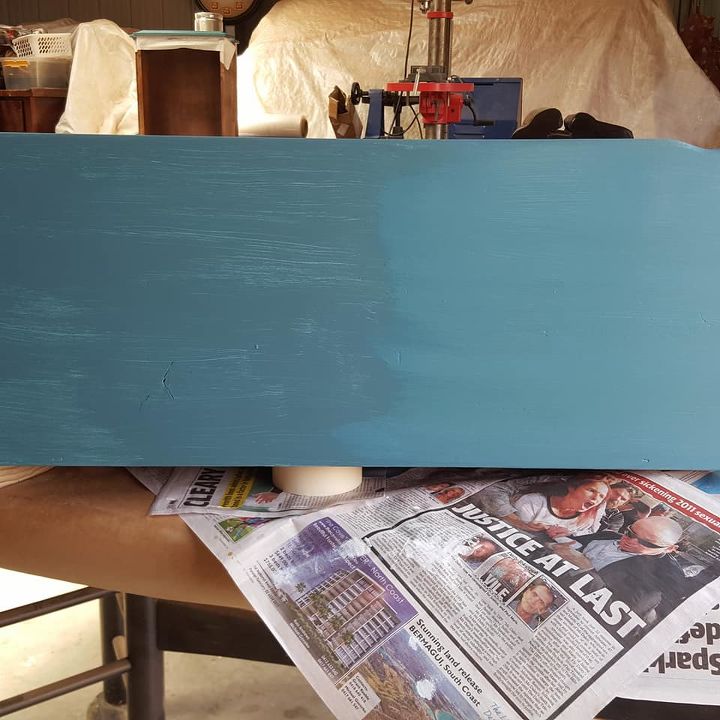
I had never used Annie Sloan chalk paint before and it was hard to get in Australia, but I really loved the colour Peacock which I had seen on Pinterest . It said "no need to sand or prime" but I could not take the chance. I needed to finish this desk because my work shed had too many jobs on the go at the same time.
I put a coat of primer and 2 coats of Peacock paint, which was made up from 2 Napoleonic Blue + 1 part Antibes Green + 1 part Aubusson Blue. And I added 2 coats of clear wax. The left is with one coat and the right with 2 coats. I have to admit I was not 100% convinced on using the wax, I felt it left every fingerprint or mark in the paint. It is now 1 week dry and feeling a little happier, But I don't have room in my shed to hold on to projects for weeks after completion to wait for them to cure. So I think I will be looking for a new sealer for the chalk paint.
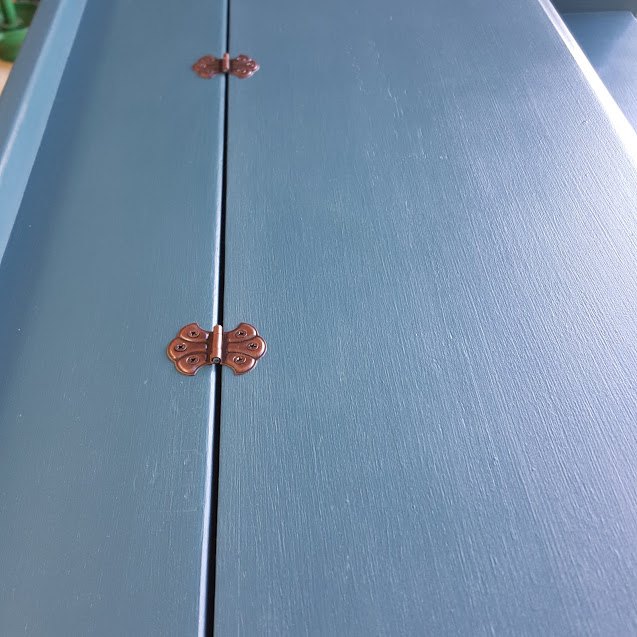
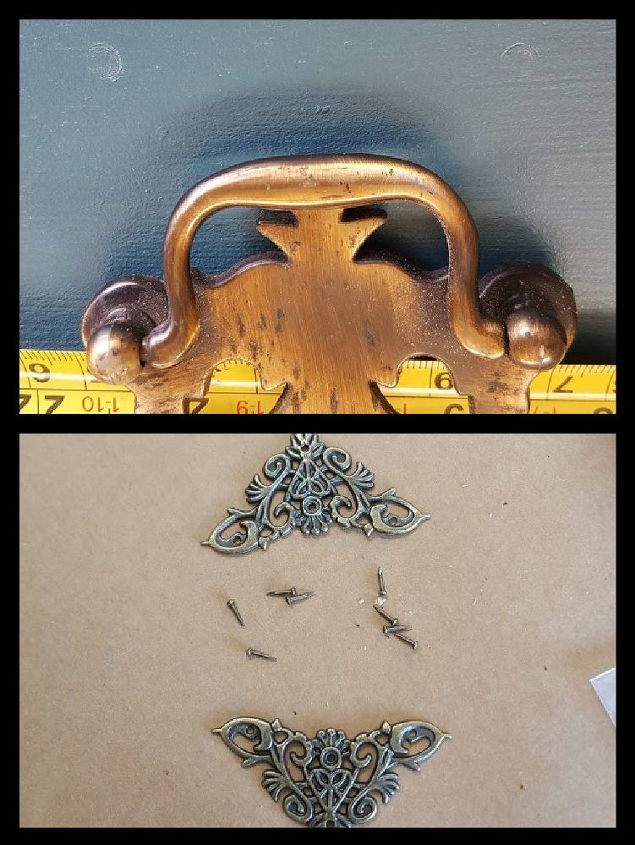
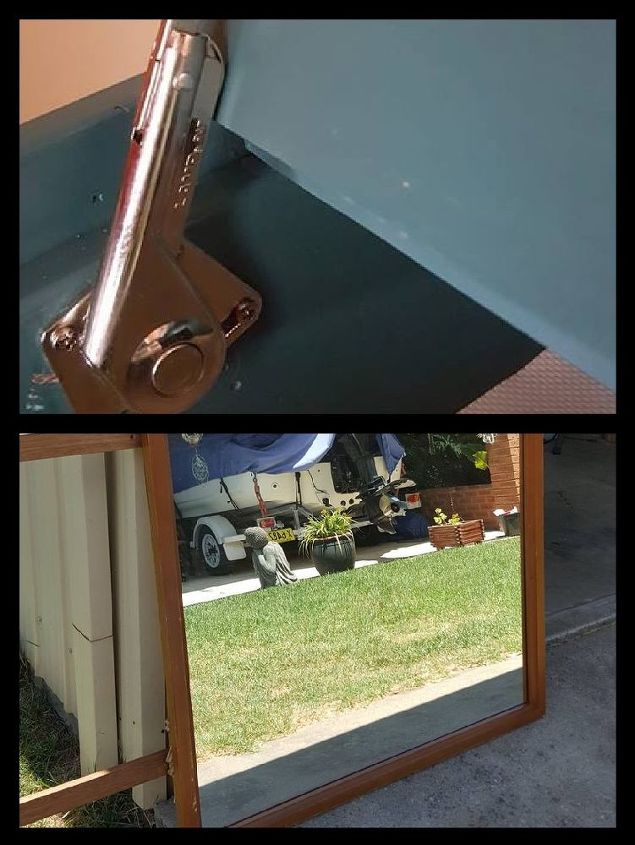
To add my top hinge to the lid, I found the centre point of my lid and the centre point of my hinge and lined the two up together. I put my hinge the right way up and gently hit it with a rubber mallet to mark where the holes needed to be drilled. I ordered these decorative corners in bulk off Wish, 12 for $3.00, which I added to the corners as decoration.
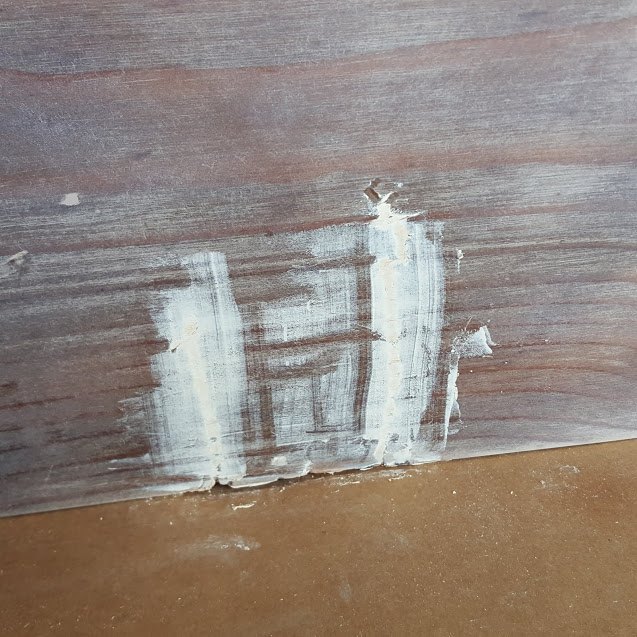
I recycled a lid Lifter from an old toy box, but it is a good idea to fit it before you paint. I had to move mine so I had to touch up the paint.
Lastly I had this old mirror I was given, and wanted to put a mirror under the lid on the desk. I read up on "how to cut a Mirror". I followed the steps to the letter and it did not work, my mirror snapped down the middle. So I took it into town and I was quoted $2.00 to cut the mirror to the size I wanted. So please with my bargain, I said great go ahead. They then asked me if I wanted the edges polished. Me: sure no problem!! The bill was $22.00 which was more than the whole desk had cost me. Oh well I will know for next time. I attached the mirror using self adhesive velcro.
It only took me 2 hours to alter the desk to the way I wanted it to be and the rest of the day to paint it.
To see more of my unique creations
No comments