Cheap, Easy and Beautiful Bar Cart Makeover!
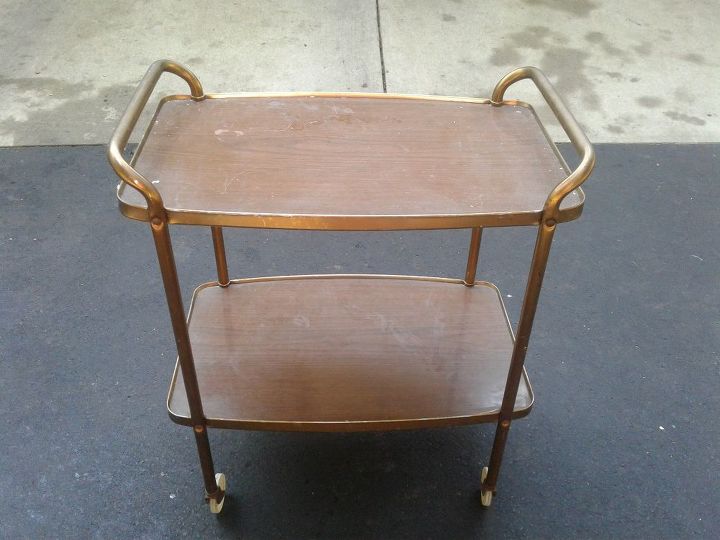
I found this ugly bar cart on the side of the road. I don't blame the people for wanting to toss it, it was ugly and the wheels didn't roll quite right.
But for a DIYer like me, this is almost like finding gold!
I had wanted a bar cart for soooo long and was so excited I finally found one that I could give a makeover.
And this makeover was so easy and looks perfect.
Time: 1 Hours Cost: $5 Difficulty: Easy
How she looked when I found her. A little sad, a little rusy and a whole lot of dirty. But I could see the diamond underneath ;)
What you'll need for this bar cart makeover:
spray paint
painters tape
marbled contact paper
Start by putting painters tape around the wheels of your cart. You could also use bag, or any other way to cover up the areas that you don't want painted.
Then spray paint the metal parts of the cart. My trays aren't removeable and since I was going to cover them I didn't mind if they got the over spray from the paint. I used a matte silver color for mine.
When the paint has dried you are ready to prepare your contact paper. Depending on how your trays are, if they are removeable or not, etc will determine the easiest way to do this. Basically you are going to cover your tray with the contact paper. I created a template with some scrap printer paper and then transfered that template to the contact paper.
Make sure your tray is clean and dry and free of any little crumbs before sticking down the contact paper. If the contact paper bubbles up, just peel it back up behind the bubble and restick it down until you are happy with how it is laying.
You can also use a credit card to help smooth out any bubbles.
I did the same technique with creating the template and tracing it on to the contact paper for both the top and the bottom trays of my bar cart.
When the paint has dried completely you can remove the painters tape from the wheels.


No comments