
One of a Kind Sliding Barn Door (with a Pet Door Built in It!)
Learn how to build a sliding barn door (complete with a pet door!) with this step by step tutorial. Using repurposed wood from an old farm building, this DIY project instantly adds rustic charm to any home!
Time: 8 Hours Cost: $150 Difficulty: Advanced
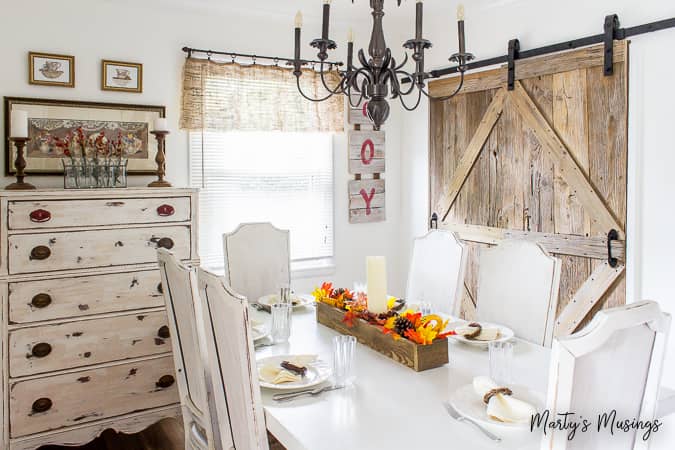
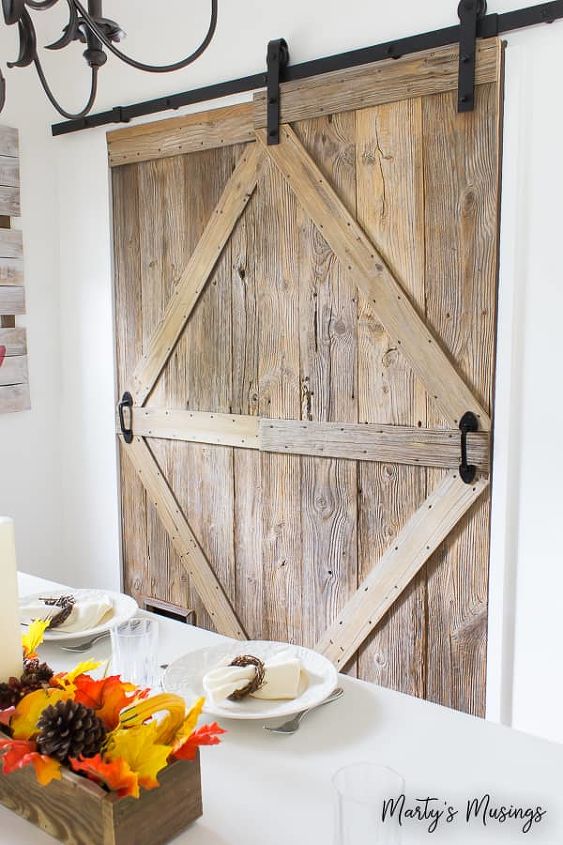
The finished project! You can't even tell there is hidden access for our cats! The barn door was just one project in a total kitchen remodel and you can read more on how we saved thousands of dollars.
From my DIY hubby: Of the many repurposed wood projects we’ve done, this one may well be the most rewarding. And required the most planning.
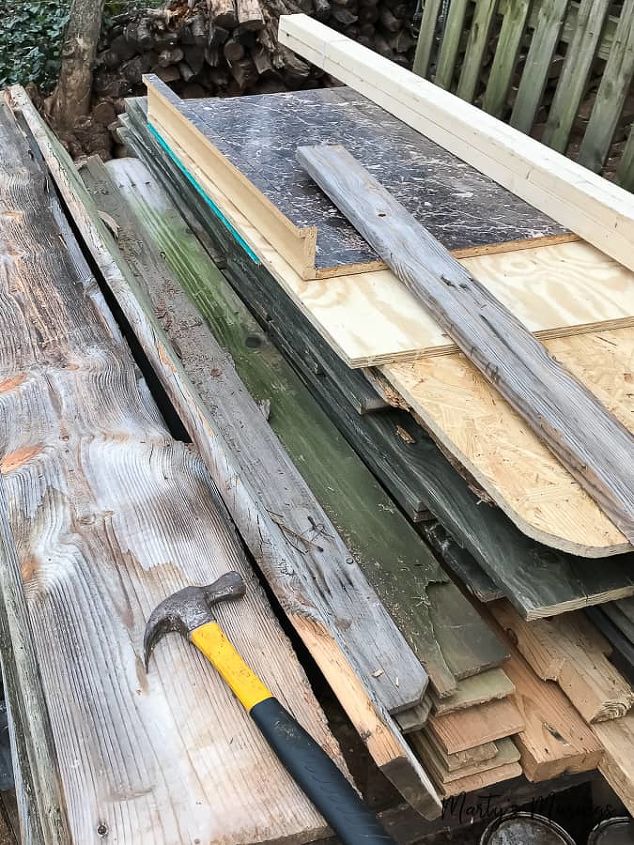
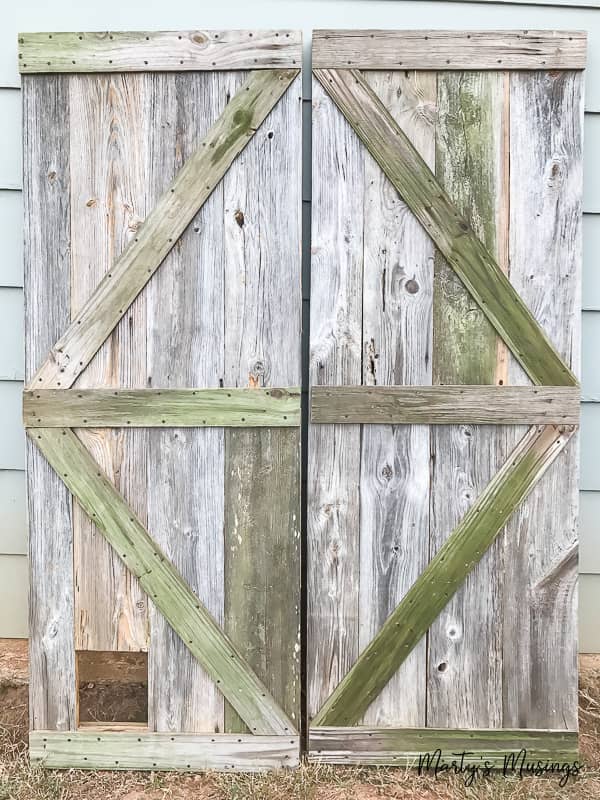
I have some really nice pieces of tobacco barn wood and old fence board slats with a lot of character, but for barn doors the wood needed to be much straighter, without warping and twisting.
That was determined by measuring the raw opening where the doors would be hung and then adding 12″ for the overlap. These doors would not meet, but, rather, overlap at center.
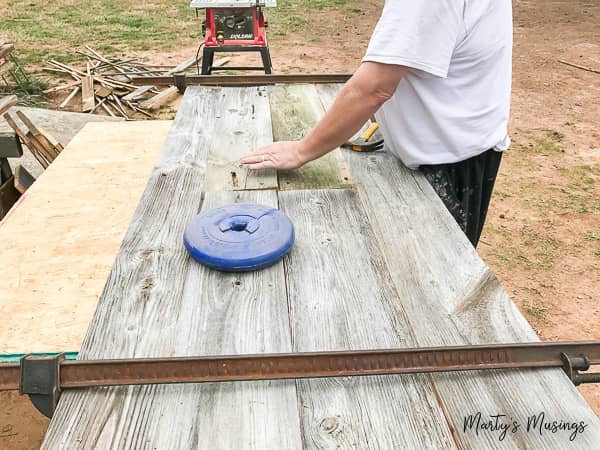
Still roughing out the design here, but I used 4′ furniture maker’s clamps to temporarily hold things together and confirm measurements versus the rough opening dimensions.
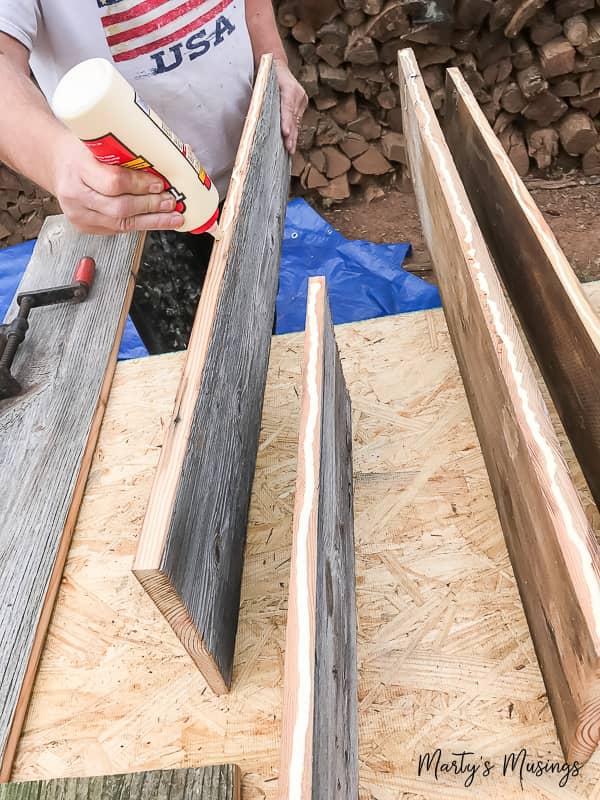
Glueing repurposed wood together is not a bad idea, especially if your wood has not “seasoned” for an adequate length of time. This just reinforces the bracing you will also use to hold everything together.
I ran a healthy bead of glue down one edge of each board and then laid them back down, pushing them together. No need to glue both edges, because you’ll pick up the other edge with the glue on the joining edge.
Once together, I clamped everything together and began working on bracing.
I used black 3/4″ fine tip sheet rock screws in addition to glueing the braces. This was a great way to keep everything tight and square, as well as retarding warpage down the road.
Clean and prep the wood. If I were to do this again, I would definitely sand and clean the wood prior to assembly. It is just much easier to deal with at that point, rather than tackling an assembled piece. I was just excited to get these put together!
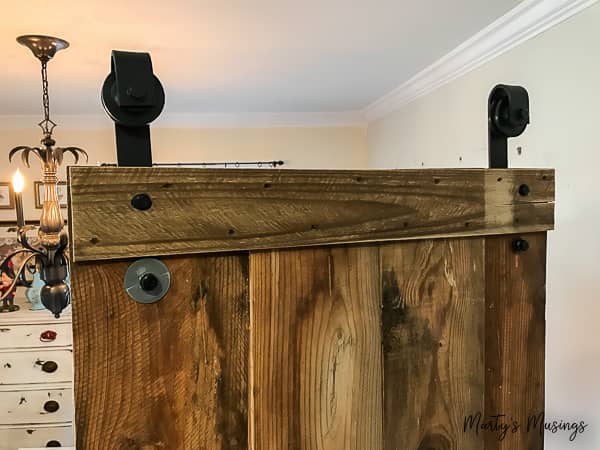
Each barn door kit, determined by your opening width, comes with installation instructions, but it is KEY that the guide is securely anchored to the wall, regardless your application.
The kit we chose to buy was much less expensive than the local box store, but I did choose to beef up my anchors provided with the kit and used 3″ anchor screws right into the header above the door.
The second half of the kit installation is attaching the bracket rollers to the door. Again, instructions are provided in the kit, but I will caution that precision is crucial when placing and installing.
Once the guide is up and the brackets installed, it’s only a matter of lifting the doors onto the track and determine where the “brakes” or stops go. Typically, that is just short of the opening, so the doors bump right up to the casing or opening. Again, instructions are with the kit.
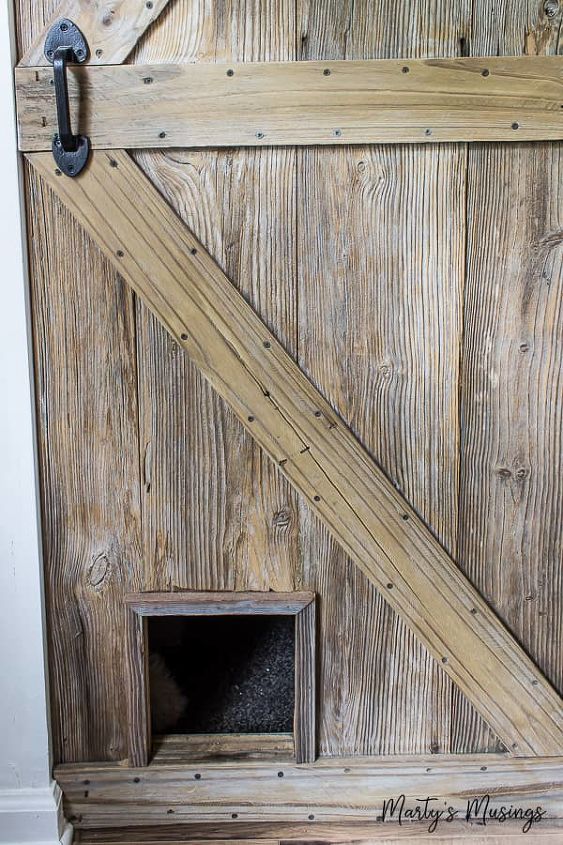
The kitty door! The pantry also serves as the area where pet food is stored and where the cats abuse the cat litter box. The dogs are fascinated by both things, so we’ve always allowed access through a small pass through door.
I made this one just the right size for all the furry friends in our family! They love it!
You can read complete step by step details on the blog post!
Materials used for this project:
- Sliding barn door hardware (Amazon)
- Gate handle (Amazon)
- Wood glue (Hardware store)
- 3/4" wood screws (Hardware store)
No comments