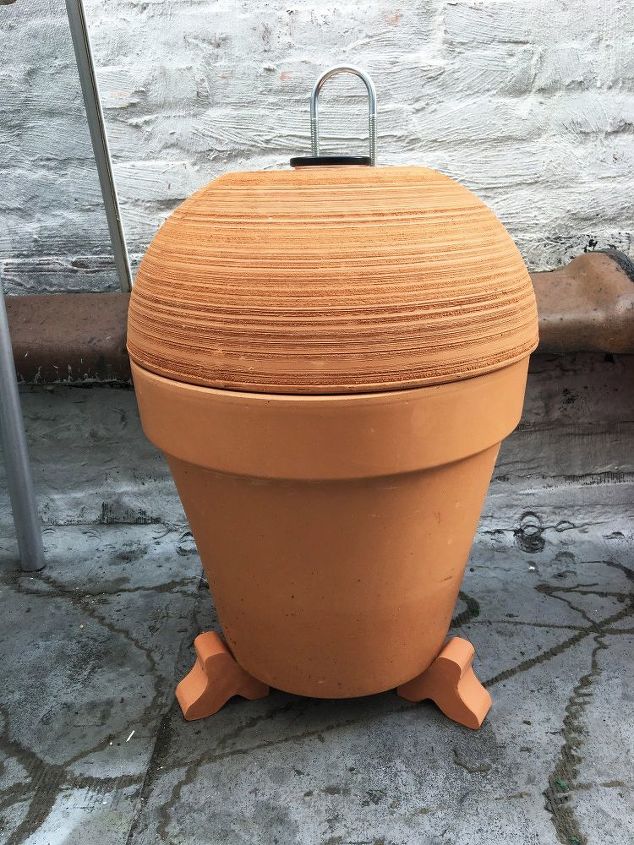
Terra Cotta Pot Smoker
Don't you just LOVE smoked meats and cheeses? I certainly do! BBQ's are great, but slow smoked meats are something else entirely! Meat smokers can be seriously expensive though! That's why I made this meat smoker for a fraction of the cost with some simple terra cotta flower pots, a single burner, and a grill grate.
This thing not only has delicious purpose, but it looks kinda cute too!
Here's a video of me doing this live, in case you want to see how it all went down.
SUPPLIES: -Grilling Skillet -Single Burner -Wood Chips -14-17" Terra Cotta Pot -14-17" Azalea Pot or scratch pot -Grill Basket / Aluminum Cake Pan -Terra Cotta Pot Feet -Masonry Drill Bits -Drill (Not pictured) -Saw -U-Pull Handle -Extra Nuts (that fit the u-handle) -Grill Thermometer -Rubber Washers -Rubber Stopper -Oven Foam Tape (not pictured, will add at a later time)
STEP 1: The burner I got had plastic handles so I cut them off with a saw so that the burner fit down in the pot.
STEP 2: Feed the cord of the burner down through the hole on the bottom of the large terra cotta pot you intend to use for the bottom portion of the smoker.
STEP 3: Find where the dial is on the burner and drill a hole on the outside of the pot in this spot so that you can move the dial and adjust the temperature. First start drilling with a small masonry bit and then move up to a larger masonry bit. These pots can crack if you don't carefully drill so it is best to start with a small bit and work your way up. When you are smoking meats you can place the rubber stopper in this hole to help keep the smoke inside.
STEP 4: Now place your grill tray directly on top of the burner. Fill this tray full of wood smoking chips. *If you can't find a grill tray you can use an aluminum cake pan, a sauce pan with the handle removed, or a cast iron skillet with the handle removed.
STEP 5: Now we are going to grab the top pot (the "lid") and prepare it. First take your grill thermometer and push one of the rubber washers onto it. Feed the stem of the thermometer through the hole of the top pot and place the other rubber washer on the other side and screw it in place.
STEP 6: Now grab the handle you are going to use and mark where it will sit on top of the pot lid. Using your masonry drill bits drill holes in the spots you just marked on the lid. *Again work your way up with the masonry bit sizes.
STEP 7: Once the holes are drilled remove the bar from the u-pull, but replace the nuts so that they sit on top. On the inside of the pot lid place the bar that came with the u-pull over the ends of the handle and then using your extra nuts screw it in place.
STEP 8: Back to the bottom of the pot! Grab your grill grate or grilling skillet and remove the handle (if it has one) Now simply set it in the pot so it rests above the wood chips and catches on the inner lip of the pot. Find where you want to set your smoker and place the bottom pot on top of the terra cotta feet so the cord has room to hang from the hole.
Now you are ready to add some meat and get smoking! * I think I am going to get some bbq gasket to add to the rim of each pot so no smoke leaks out and so that the pots rest more easily on one another.
*The point of a smoker is to cook meat slowly at a low temperature. Make sure your smoker stays at about a temperature of 200º.
Suggested materials:
- Terra Cotta Pots (Lowe's)
- U-Pull (Lowe's)
- Grill Thermometer (Amazon)
- Single Burner (Amazon)
- Terra Cotta Feet (Lowe's)
- Grill Grate / Basket (Bed Bath and Beyond)
- Grilling Skillet (Dollar Tree)
- Wood Chips (Lowe's)
- Masonry Drill Bits (Lowe's)
- 2 Nuts (Lowe's)
- Rubber Washers (Lowe's)
- Rubber Stopper (Lowe's)


No comments