DIY Large Shelving Unit
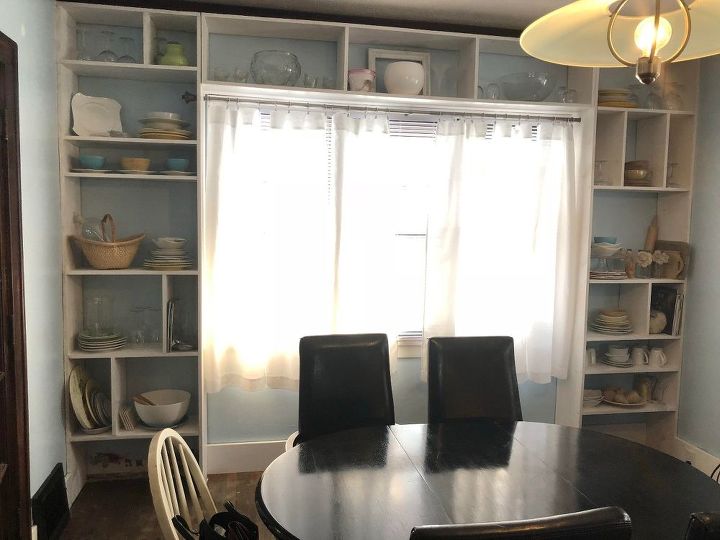
We transformed a blank wall and a kitchen with little storage to this. The entire project cost $80.00. We bought 1x12 pine boards from Menards and went to work.
Time: 5 Hours Cost: $80 Difficulty: Easy
This was what it look liked before. Just a blank wall. We decided to build the shelving unit around the window. We pulled off the baseboards, scrubbed the walls, and removed the plates from the electrical outlets.
My hubby and his friend went to work measuring the wall. We wanted it to meet up against the trim and fit snug against the window frame. It was 8 feet to meet up against the trim and measured 27 inches across.
We started putting the shelves together. Long boards for each side of the shelf. The cuts were simple to do. The pine boards were cut down to 8 feet for each side. Than we cut a board for the top part of the shelf. My husband cut a bunch of boards for the inside shelves. They were all 25 inches across. It was fun because you can create the shelves to look anyway you want. I did all 3 different to add character.
This was the end result. I white washed it after we had put it together. If we ever do it again I would recommend painting the shelving units after they are put together, but before they are anchored to the wall. We have a lot more storage space now. My husband used 3'' screws to anchor the shelves to the wall. 4 on each side. This shelves are solid and strong! The middle one above the window was screwed into the the sides of both shelves. We did have to make a hole in each shelf so I could hang the curtain back up. And our baseboard split for the left side. So don't look  we still need to fix that piece! Eventually, we want to build a bench for the bottom that goes across the window.
 we still need to fix that piece! Eventually, we want to build a bench for the bottom that goes across the window.
Materials used for this project:
- 1x12 Pine boards (Menards)
- Miter Saw (On hand)
- Drill (On hand)
- Screws (1"1/4 Menards)
- White Paint (or whatever you want) (I had this on hand. You could also stain the boards which would look nice.)
- Screws (4 for each shelf) (3'' We used these to anchor the sides of the shelf to the wall.)


No comments