Guitar Glam
Cleaning out my craft room, I ran across a guitar that had long been abandoned and outgrown. I thought of selling it, as is, but then I decided to try my hand at a new (to me) stencil technique. The result would be a fabulous addition to any music room.
Time: 8 Hours Cost: $10 Difficulty: Easy
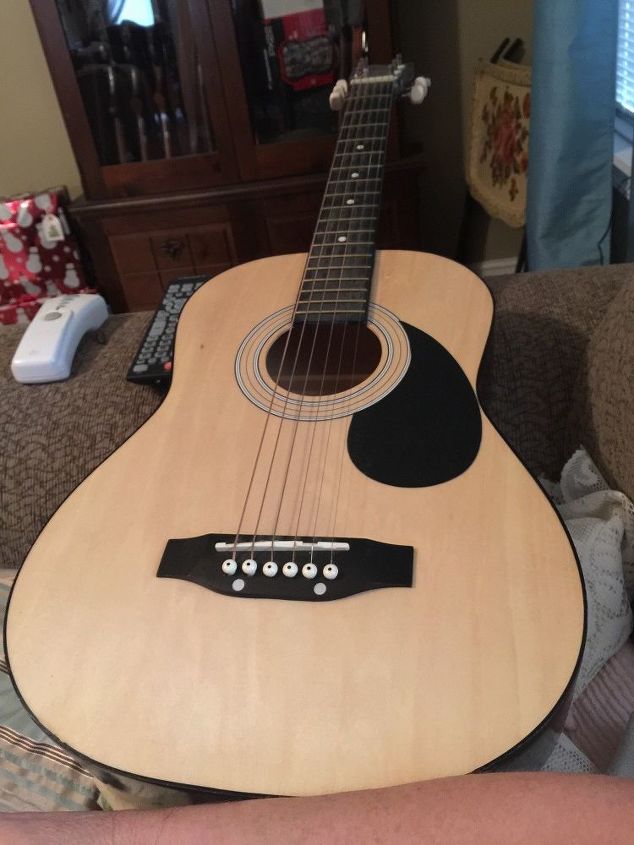
The original youth guitar my son outgrew and told me to get rid of. (He got a new one for Christmas)
I disconnected the strings from the tuning pegs and placed them in a ziplock bag to protect them from paint. I later removed them completely which made the process a lot easier.
I added the first coat of chalk paint. This was a real trial and error project as I knew the look I wanted but wasn't sure how to achieve it.
I added vintage music sheet with Mod Podge. Once this drys you can lightly sand the over hang for a smooth look.
Next I began the stenciling process. I laid the stencil at an angle and added sheet rock mud with a putty knife.
Once the stencil is removed you have a nice raised effect. I let the stenciled area dry and then place the stencil back on using the raised detail as a guide. Your stencil should fall right into place.
I new I wanted to highlight the detail of the stencil but I wasn't sure how to do it. I decided to paint over the raised edges with black paint, paint over it again with off-white chalk paint and sand to the black but it just did not give me the look I wanted (see below)
As you can see, the detailing just wasn"t there... so back to the drawing board I went.
I finally decided to add another coat of off-white chalk paint and seal with Polycrylic.
Next I mixed dark oak stain with a glazing medium and applied it to the raised stencil... wiping off to get the look I wanted.
Materials used for this project:
- Guitar
- Sheet rock mud
- Chalk paint
- Polycrylic
- Stain
- Sheet music
- Mod Podge
- Stencil


No comments