I Made an End Grain Wood Floor From Scratch and Saved Myself $4000!
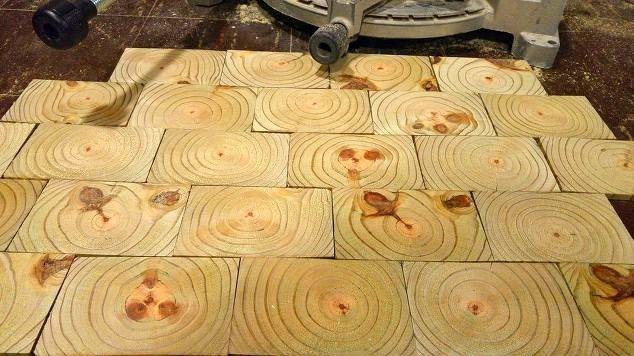
One day I had come across a flooring in an old church and became intrigued, I had never seen anything like it before. It was a wood floor, but as opposed to the side of the grain being exposed, it was the end of the grain. I decided that I needed to recreate this old world craftsmen appearance in my own home.
Time: 20 Hours Cost: $468 Difficulty: Advanced
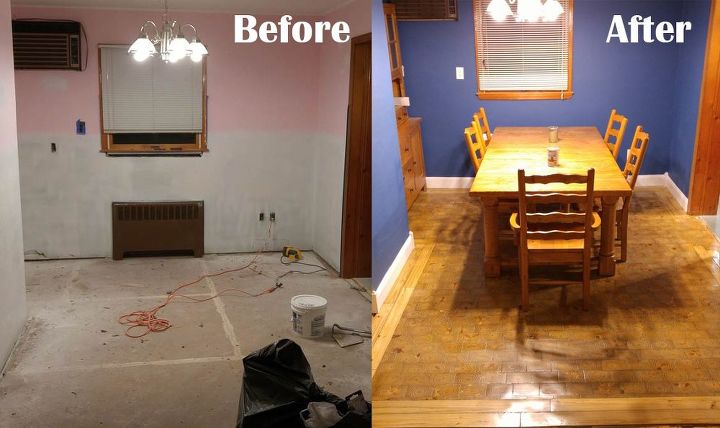
A few months ago I purchased a house that was carpeted from wall to wall with the most horrible carpeting. Before purchasing it I had done some snooping and after lifting several corners, realized that underneath the carpeting was hardwood flooring, throughout. So, I knew after purchasing the home it wouldn't be much of a task to rip up this eye sores, spend a few hours sanding and refinishing and I would be happy with the new look. below is what the dining room looked like on closing day.
After ripping up the carpeting, this is what I found in the dining room... MDF. Not what I wanted to see. I had hopes that their might be some hardwood under it so my adventure continued.
After ripping up the first MDF subfloor (and having started some painting), I stumbled across this, more of less of what I wanted to see, linoleum flooring.
I went out and found twelve, 8 foot long 4 x 6 timbers of reclaimed yellow heart pine that I proceeded to cut into 1,800 4 x 6 tiles. I set up my Dewalt DW705 chop saw with a 1/2" stop to make the cuts quickly and consistently. This process took about 5 hours. When I was done I was left with a completely filled 32 gallon trash can of sawdust that I saved for later. I had plans for that too.
Along the way I decided to border the room to accent the edges.
After the tiles were set, I sealed them with a coat of polyurethane, lightly thinned with about 30% mineral spirits.
After the tiles were set, I sealed them with a coat of polyurethane, lightly thinned with about 30% mineral spirits.
After the tiles and border were set and sealed. I made a mixture of sawdust from my cuttings with polyurethane with a ratio of about 2 parts sawdust to 1 part polyurethane
After the tiles and border were set and sealed. I made a mixture of sawdust from my cuttings with polyurethane with a ratio of about 2 parts sawdust to 1 part polyurethane
After letting the grout dry for 3 days, figuring that was enough for the 1/8" wide by 1/2" deep channels to fully dry, I went to work on sanding the floor smooth. I used an orbital sander which took 4 hours, I imagine it took much longer than a drum sander would have, but it saved me a step of needing to do the center of the floor and then follow up with an edger.
I am thrilled with the results and the warm feel or real wood is so much better than the cold feeling of an icy tile, or the disingenuous look of a laminate, which were my second and third, much simpler choices.


No comments