
Mask on Canvas
Believe it or not, this is my starting point. This mask has been hanging on my wall for some time, collecting dust and cobwebs. And yes, it's one of those Kathleen Thomas masks from New Orleans, with a $40 price tag on the back. Not to worry, she will not be harmed by this project.
Time: 3 Days Cost: $15 Difficulty: Medium
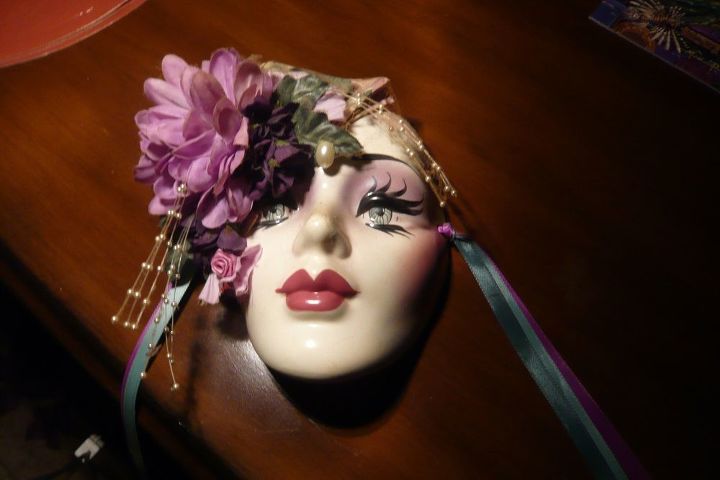
Begin by removing all the flowers and ribbons. Hot glue was scraped off using a single edge razor blade. I'll be able to put her back together with fresh flowers and ribbons later.
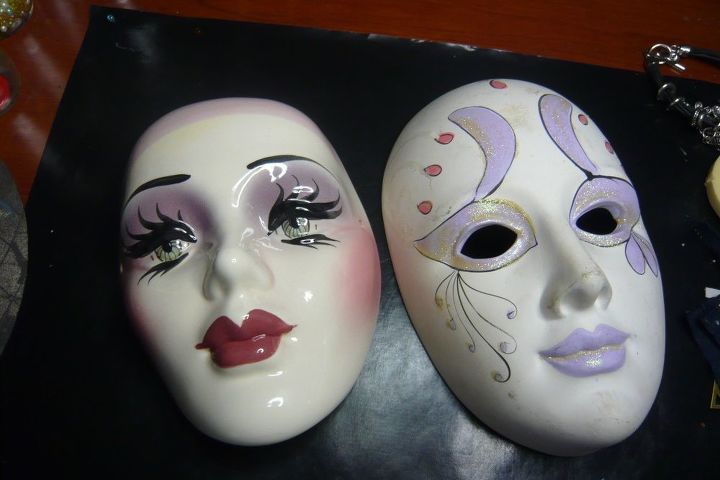
Wouldn't you know, as soon as I got her stripped down and ready to go, I ran into this second mask at a local thrift shop on a 1/2 off $2.99. I had already started the mask form, but just to let you know I would have preferred the one on the right because I think the feature are better defined, it lays flat on the table and it is slightly larger. Oh well! I hope I like this project enough to do it again.

Gather supplies, glue, Plaster of Paris (POP), cheese cloth, rubber gloves, plastic container, cling wrap, acrylic paint, a plastic sheet and light weight fabric and of course, the mask. Oh and we will be using a large platter and a turntable.
To mix the slurry, I use Plaster of Paris Elmer's glue, and water, this time using 1/2 cup each. By adding black acrylic paint, it gets me closer to the finished color I'm hoping for.
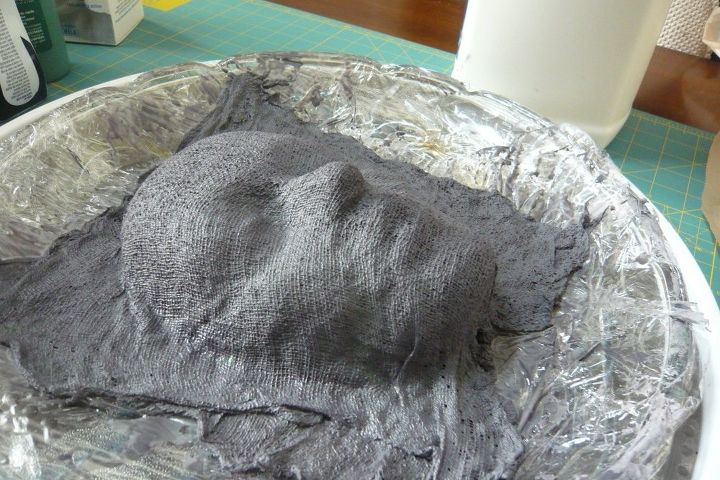
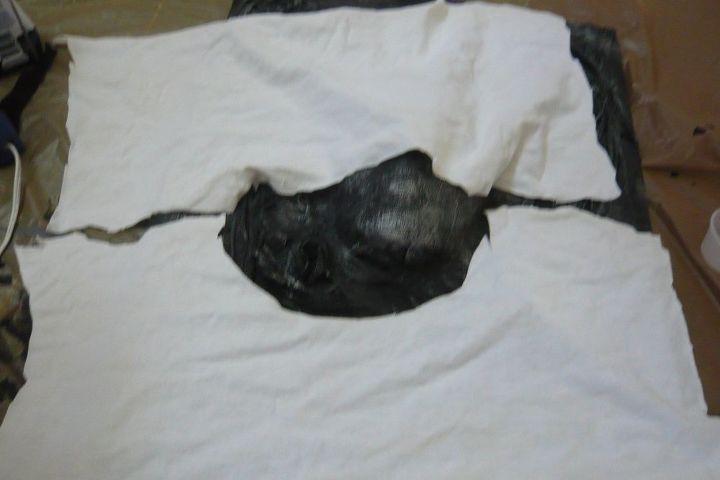
First cover the mask and work area with cling wrap. Begin by cutting three squares of cheesecloth that are 12"x12". Dip each square into the slurry and place across the mask, one at a time, smoothing out after each layer. It takes about 24-48 hours to dry completely. I did elevate it onto a cookie rack to help out the drying and later, removed the mask when it became possible to do so. As with any first attempt, I have to experiment my way through it. Since this will be mounted on a canvas, I used the leftover slurry and smeared it all over the canvas. This will act very much like a Gesso with just a little more grit.
I found this 18" turntable (in fact 3 of them) at a garage sale for $2/ea. It really came in handy to keep turning the project as I molded it to the mask. They are available at Walmart, Amazon or Ebay. The other two were put to work in the corner kitchen cabinet and they "turn" out to be very useful in an otherwise inaccessible area.
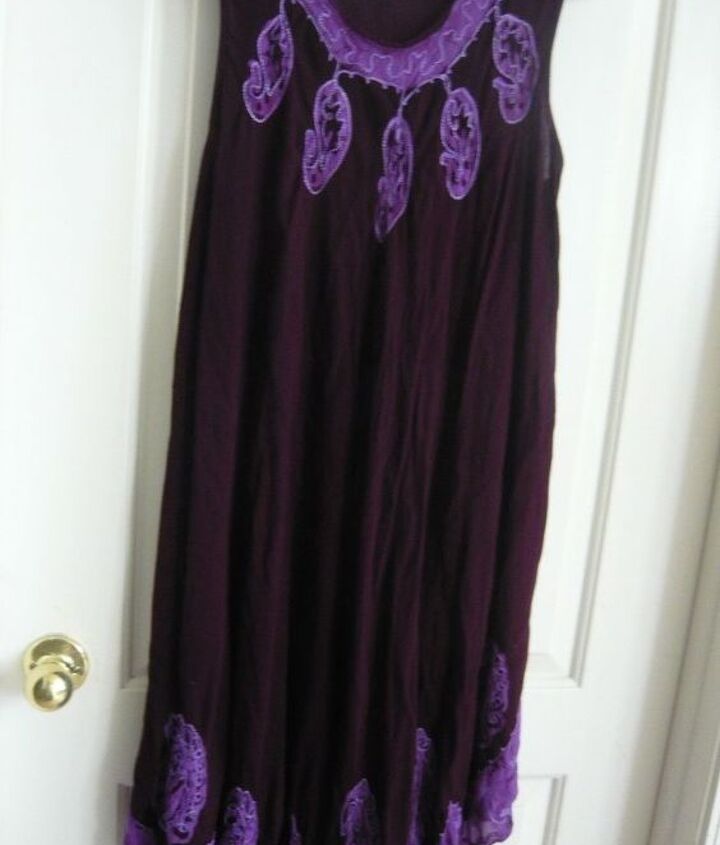
This dress I bought at a garage sale for $1 and has been waiting in the closet a long time for just the right project. The fabric is very light weight and will easily absorb the slurry. It will be cut up into strips about 3-4" wide and the hems and seams will be removed.
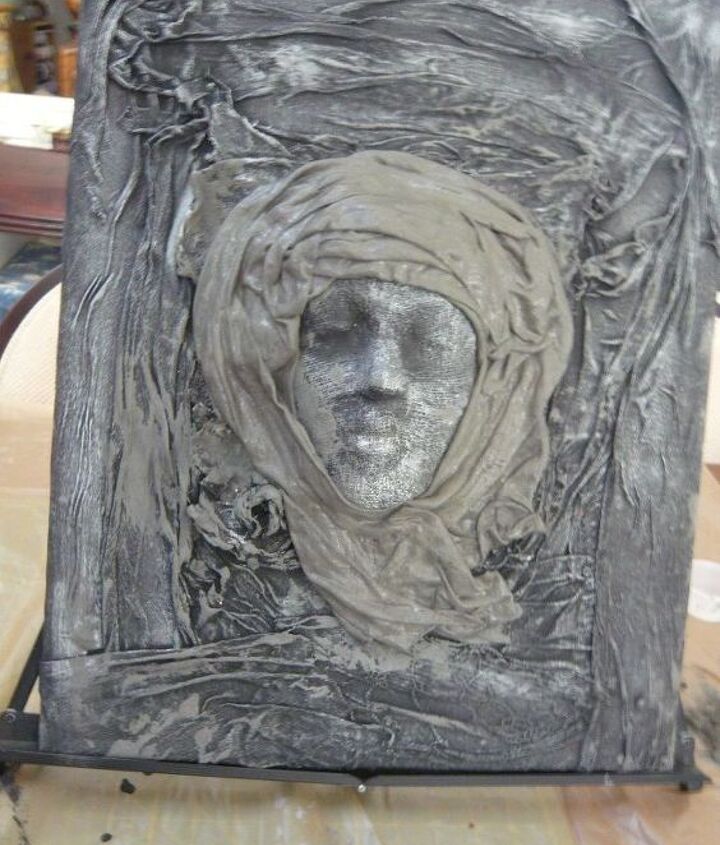
I don't want to take you into the weeds here but just to say that I prepared the canvas by dipping my gloved hands into the slurry and wiped it down. After the mask was completely dried I mounted it to the canvas using hot glue. Then the entire background is using the light weight fabric from the dress.
For the head dress I wanted a more substantial fabric. So I cut up a well worn t-shirt. Please take note that it is not important to have even cuts, even the neckline needs no attention except to cut off any seams and/or binding. This is then dipped into the slurry and mounted by surrounding the face mask.

Like water, the fabrics just seem to find their natural place. There is plenty of time to move around and re-arrange if you wish to do so. I did arrange a "flower like" puddle on just left of the chin area. I also wanted to arrange the t-shirt fabric to the extent that it covered her forehead and came down below the chin. It will take about 48 hours for this to dry enough for the next step.
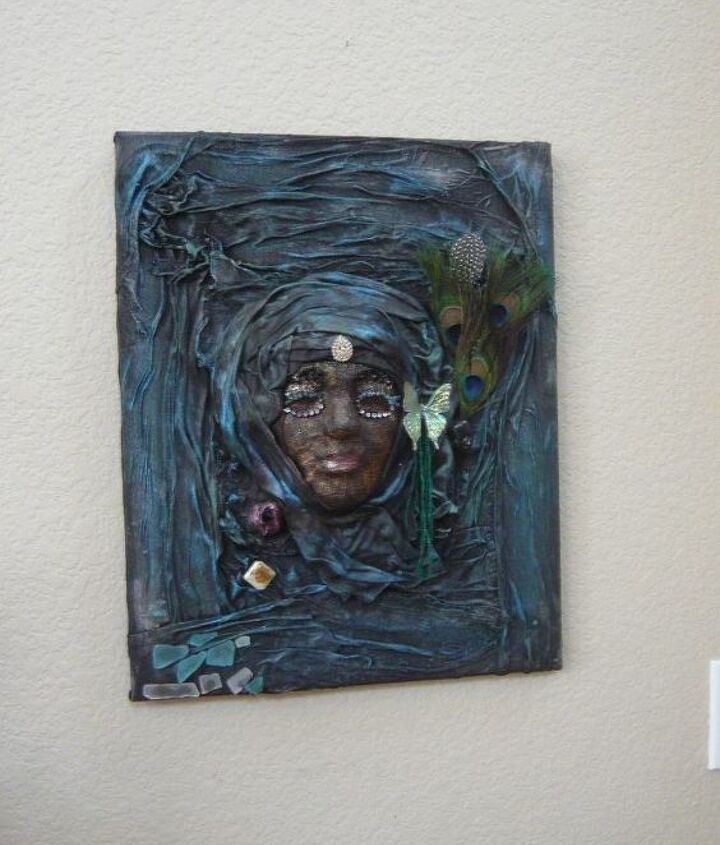
The final piece, of course, is simply artistic expression. I used a variety of acrylic metallic paints (antique gold, emerald green, aquamarine, sapphire, and bright red) as well as a black alcohol ink. Beyond that, as you can see bling and other accessories.
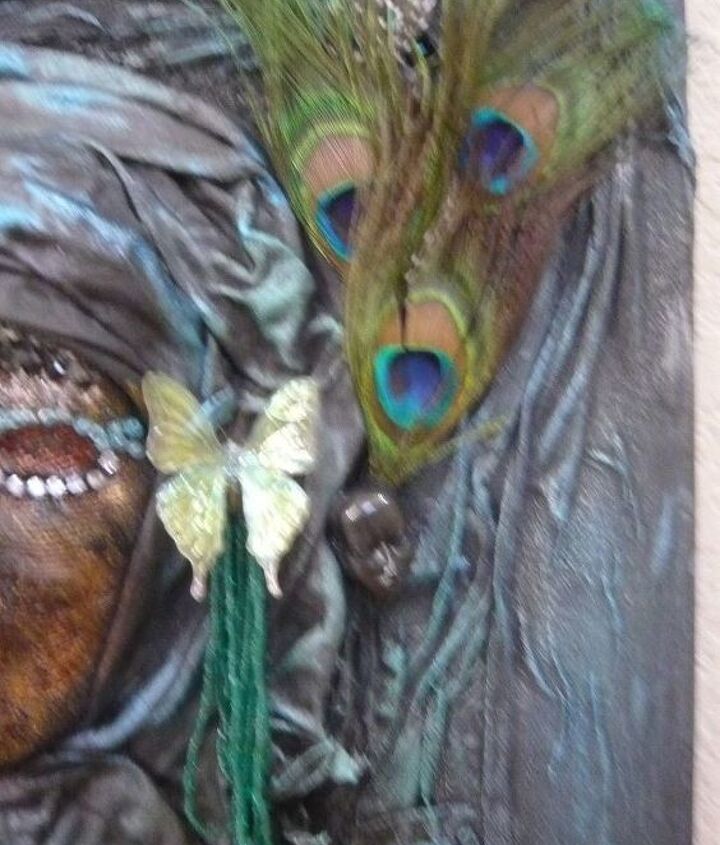
Here you can see the peacock feathers, a butterfly, green seed beads, and oh yes, I tucked in the little black face for giggles.
This tutorial is really about using the "slurry" in yet another way. The mask, the background on canvas and a "no fear" approach to self expression. All this meant working outside the box. There are no mistakes... If something pops up unexpectedly you simply cover it up with a new layer of paint, ink etc. Just have fun with it. The hardest part of this project was taking a picture which could do it justice. I must have taken 3 dozen pics. Very difficult to get the proper lighting and setting.
Hope you enjoyed it.
Materials used for this project:
- Plaster of Paris (Lowes)
- Elmer's White Glue (Lowes)
- Rubber Gloves (Amazon)
- Cheese Cloth (Ralph's Grocery)
- Cling Wrap (Costco)
- Plastic protective cover (Lowes)
- Porcelain Mask (Thrift Shop)
- Light weight fabric (Pre-owned)
- Canvas (Michaels)
- Metallic and Acrylic paints (Joann's)
- Metallic Ink Sprays (Joann's)
- 18" turntable (Walmart)
No comments