No-Rub Magic DIY Cleaner & Degreaser for Your Kitchen Hood
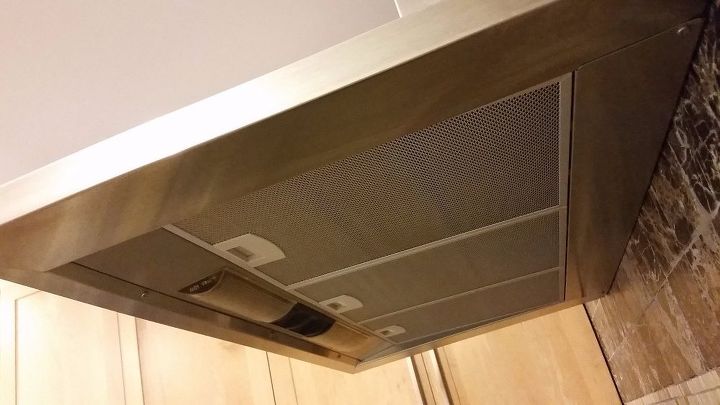
Seriously. Do you remember last time you cleaned your kitchen hood? I do: Never! So it’s time to tackle the “Hood Project” and give it some love. I was lucky to find a magic no-rub recipe that will dissolve the grease in no time -- perhaps the easiest and most satisfying thing I’ve ever used. Need to know how it works? Read on!
Time: 30 Minutes Cost: $4 Difficulty: Easy
After perusing the internet looking for a recipe, I realized that my cleaning cabinet contained all ingredients needed to make this magic formula. Can you take a guess?
You know the magic of Dawn and Vinegar when it comes to get rid of grease, and the power of baking soda. Combine this with water and voila! And the best part is that it doesn’t need any elbow grease.
STEP 1: GATHER YOUR INGREDIENTS
Here’s what you’ll need:
— Distilled white vinegar: 2/3 of a cup to 1 cup (Amazon)
— Baking soda: 1/4 - 1/2 cup (Amazon)
— Dawn liquid soap (I used the classic, blue color): 3 tablespoons (Amazon)
— Tap water: at least 1.5 gallons, depending on your pot
You’ll also need:
— A large pot, the tallest you can get. (Amazon)
— Tablespoon (Amazon)
— Wooden spoon (Amazon)
— Sponge or soft scrubber
— Brush or old toothbrush
— Kitchen rag (recommended) (Amazon)
Ready? Let’s get started!
STEP 2: REMOVE FILTERS OFF THE HOOD BEFORE CLEANING
Before we start concocting, remove all filters off the hood. TIP: To protect your countertop, place a kitchen rag underneath your ingredients. A little hot water and cleaner may spill as you move filters and spoons around. Get your materials ready and put them next to the stove. Now it’s time to make the solution!
STEP 3: ADD WATER TO THE POT & BRING IT TO A BOIL
Grab the tallest pot you have in your kitchen: one that fits the filters all the way in is best! Start making the DIY Magic Cleaner by filling the pot with tap water. Don’t worry about using hot tap water, we’re going to heat it anyway! TIP: Don’t fill the pot all the way up! Leave at least 2” clearance off the top. The baking soda is going to fizz and we don’t want it to spill all over. Put the pot on the stove, turn the flame on and wait a few minutes.
STEP 4: VINEGAR IS NEXT!
Get a cup (no need to use a measuring cup) and fill it up with vinegar. Then add it to the warm water. Vinegar is one of my favorite cleaners, and works well removing grease, especially when combined with Dawn! TIP: Don’t wait till the water is about to boil - Lukewarm is just fine. We still need to throw the soap and baking soda in before it gets too hot.
STEP 5: LET’S ADD THE DAWN SOAP NOW
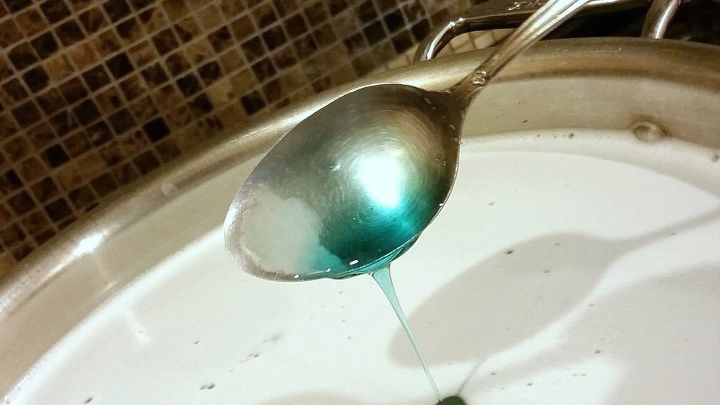
Grab the tablespoon and measure 1 full tablespoon of Dawn soap. Add it to the warm water. I prefer the blue (i.e. Classic) Dawn. It’s an excellent degreaser! TIP: You can use FAIRY if you’re in Europe. Repeat 3 times, to make 3 tablespoons. Get the wooden spoon and stir well, so the vinegar and soap mix with the water. Keep the stove on high heat and get your baking soda ready.
STEP 6: BAKING SODA IS LAST!
Fill 1/2 a cup with baking soda. I used about 1/3, but if your filters are really dirty go with 1/2 cup. Use the tablespoon to slowly add the soda to the hot water, one spoon at a time. If your water is too hot (or about to boil) be extra careful. TIP: You can add an ice cube to cool it down a bit. CAUTION: Baking soda will fizz as you add it to the hot water. Add one tablespoon at a time, stir, and wait a few seconds before you continue. If you see the cleaner “expanding” in your pot, turn the stove off -- or lower the flame to a minimum -- and continue adding the soda, a bit at a time, until you’re done.
STEP 7: IS IT BOILING YET? TURN THE STOVE OFF: WE’RE READY TO ROCK!
Keep stirring with the wooden spoon to make sure all ingredients -- especially the baking soda -- are well mixed. Keep the stove on until it begins boil, and then turn it off. Get your filters ready and let the fun begin!
STEP 8: PLACE FILTERS IN THE POT TO GET THE GREASE OFF
Get the first filter and put it in the water. Let it sit for a few minutes. I pulled it out in 30 seconds and -- amazing! -- most of the grease had already dissolved! But I waited a few more minutes before turning it over. I couldn’t believe how quickly -- and easily -- the grease melted. Really! If yours is older or thicker, it may take a little longer. I found the solution to be very effective without needing to scrub. But if there’s still grease adhered to the filter, use a scrubber or an old toothbrush to remove it. TIP: Keep the filter in the pot while you’re scrubbing.
STEP 9: TURN FILTER AROUND
Unless you’re able to fully fit the filter in the pot, you still have the top area to clean. So turn it around and insert the top into the cleaning solution. TIP: Again use the toothbrush to remove any grease that is still there.
STEP 10: RINSE & BRUSH TO GET THE MAGIC LOVE OUT
Once you’re done, bring it to the sink and give it a good rinse to get rid of the remaining grease and soapy water. TIP: Use the brush to ensure the filter gets a good rinse, bringing the water into the grooves and getting rid of the remaining soap.
STEP 11: KEEP GOING! WE’RE ALMOST DONE
Repeat STEP 8-10 with all your filters, scrubbing if necessary, and turning them around once the bottoms are clean. Again, once each filter is clean, give it a rinse and let it air dry. Now, we’re done!
STEP 12: ALMOST DONE! BUT FIRST, LET’S CLEAN THE GREASE OFF THE HOOD.
That was easy, right? But I’d guess you also want to clean the hood. The good news is that you can use the same cleaner! CAUTION: Make sure the cleaner is not boiling hot, or you may end up with a scalded hand! Just dip the sponge/scrubber in enough to get it moist, without fully submerging your hand into the liquid. TIP: If it’s too hot, wait a bit until it cools down or add an ice cube. Either way, grab a sponge or scrubber and dip it in the Magic Cleaner. Squeeze to remove excess liquid. Gently rub the sponge on the hood, concentrating in the greasy spots. Rinse the sponge under the faucet as it gets dirty and keep moving until you’re done.
STEP 13: CLEAN THE TOP NEXT AND WE’RE DONE.
Repeat STEP 12 on the canopy, front, and sides, or as needed. Use a lint free rag or microfiber cleaning cloth to dry it. TIP: Don’t worry about the cleaner leaving streaks on the stainless steel, you can apply a steel cleaner for a seamless finish. CAUTION: Again, don’t use the solution if it’s still very hot, and make sure your hood is stainless steel, and not painted. Some appliances -- usually refrigerators -- have a stainless steel finish PAINT that looks like steel: The paint may get damaged with the solution. If you’re not sure, test it in a corner first! After you’ve finished cleaning the hood and once it’s dry, feel free to use a stainless steel cleaner to get rid of the streaks. There are a few out there, you can get them online or at your home center (Home Depot, etc.) Or you can try first with soapy water. Luckily, I didn’t need to use cleaner. I’m so happy with my NEW FILTERS! And the best part was how easy it was to get that grease off. If you enjoyed this post, and want to receive updates, follow me. And for more on kitchen cleaning, find how to get SPARKLING FAUCETS here - http://www.hometalk.com/22372615/quick-n-easy-non-toxic-diy-cleaner-to-make-your-faucet-sparkle-again - to make NON TOXIC WIPES check - http://www.hometalk.com/20996563/non-toxic-reusable-diy-cleaning-wipes - and to CLEAN YOUR BLINDS with tongs and chopstick go to http://www.hometalk.com/18742408/get-your-blinds-shining-with-a-dyi-tongs-chopsticks-tool- Next week I’ll be getting rid of pesky stains, often hard to remove. Stay tuned!
Materials used for this project:
- Distilled white vinegar: 2/3 of a cup to 1 cup
- Baking soda: 1/4- 1/2 cup
- Dawn liquid soap (I used the classic, blue color): 3 tablespoons
- Tap water: at least 1.5 gallons
- Large pot
- Tablespoon
- Wooden spoon
- Sponge or soft scrubber
- Brush or old toothbrush
- Kitchen rag (recommended)


No comments