
Spring Colored Shade - Under Budget
Needed extra shade for lightning? Or tired of having same shade so long?
Here is a cheap and easy solution to make an extra shade.
What I have prepared to make this shade were very simple: a flower pot stand, acrylic beads, wire(0.5mm and 3mm ) , LED light ball.
Time: 3 Hours Cost: $10 Difficulty: Easy
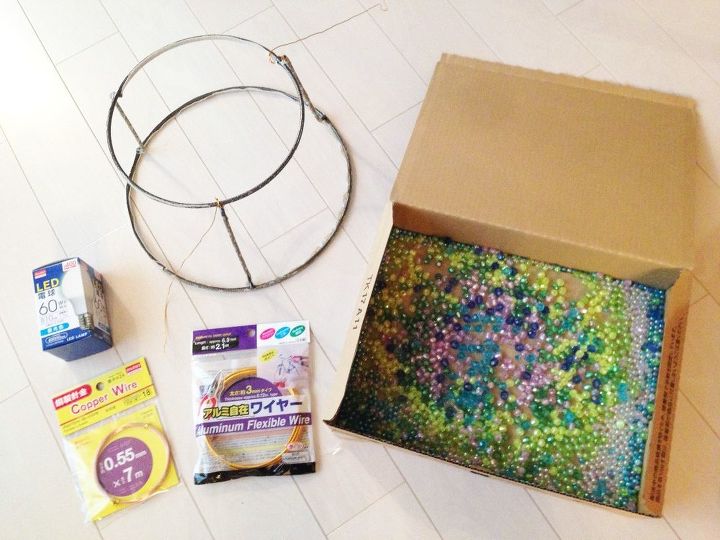
Step 1: Have everything ready.
Flower pot stand - The flowerpot stand which I found at dollar store was light enough(approximately 500g) to be used as a shade, of course it is depends on the durability of your ceiling, but please make sure ones you wish to use are not too heavy.
Mine is not so strong I think, so I choose light one just to be safe.
Acrylic beads - Any size, color, shape would be nice. It would be very nice to follow your instinct and taste of decoration.
Wire - 2 different sizes are needed. Thin wires to be used to hold each beads strings around the pot stand, 0.55mm in diameter I chose, it could be thicker or thinner than this as long as it is easy for you to manage.
NOTE: For the thicker wire, please choose soft ones if you are woman and wish to try this project on your own. While before I made this shade, I mistakenly brought and used thicker wire which I found at store, - which had almost exact same looking - , but that was too strong and tough to bend or do anything for me. I prefer to use soft ones as it is easier to manage even when I want to re-shape it as many as I want.
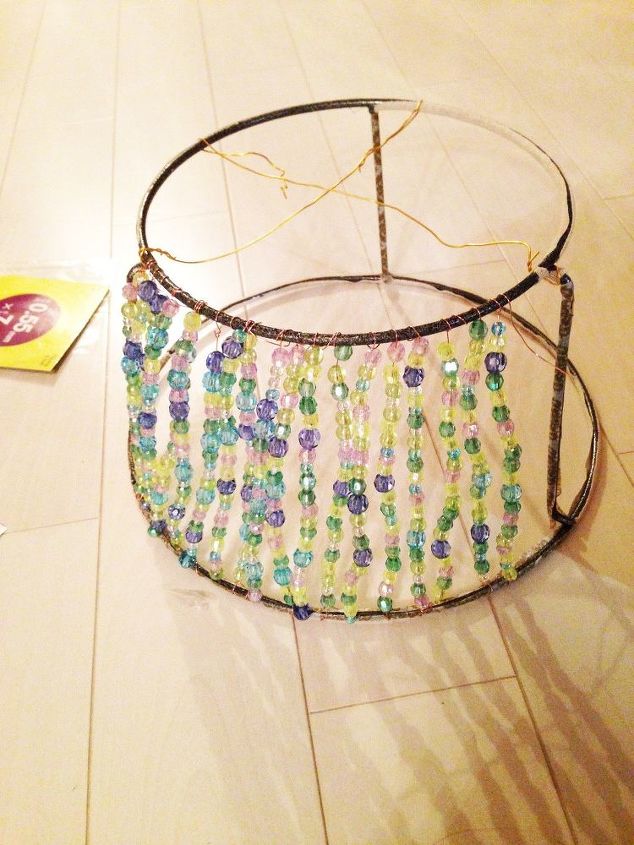
Step 2: Tie up your beads!
Take your thin wire and fix it to the pot stand. And then get your beads to start beading them around the pot stand. I think mixture of colors would be very nice, but also choosing solid colors would be fantastic in different taste.
In this post, I have imaged and used early spring colors like light green, darker green, pale pink, light yellow and different shade of blue.
Choice is totally up to you to create unique and beautiful coloring!
Step 3: Put your shade and lighting components together.
After beading around the pot stand, take the thicker wire to make fixing parts that holds shade and lighting components together.
Cut thicker wires into the diameter of top pot stand frame with extra 5-10cm for fixing and adjusting. Then, fix 2 wires at one side.
After fixing 2 wires on top, take your ceiling light components and position it to center of top part.
Using 2 wires (one side fixed) coil around the neck of component from opposite directions, like one in clockwise and other in un-clockwise. In this way the shade can be kept steadily in position, but easy to make an adjustment if you check from distance and see it is slanted bit.
NOTE: Please be noted that materials of wire could be electrical and heat conductive, therefore positioning of fixing wire on lightning components is important. Please check the instruction of your lightning components if applicable.
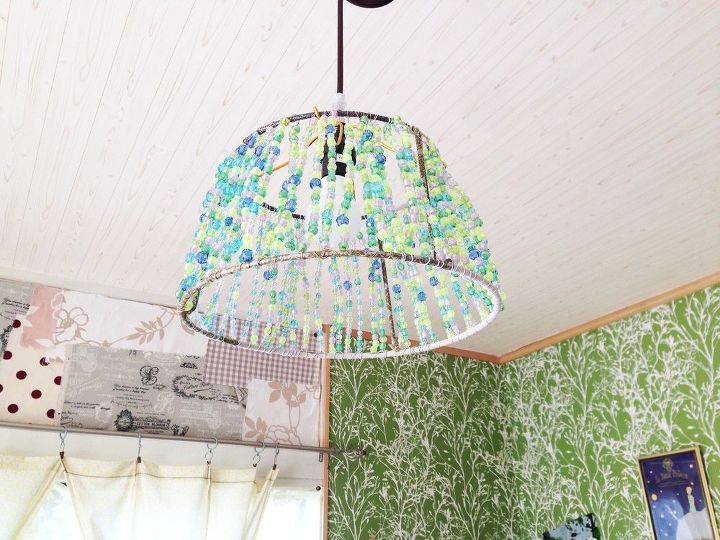
Step 4: Lights up your room with colors!
In this stage, all you have to do is just turning the lights on. When I thought about making this shade for this room, I had different shade with flower prints on it. That shade wasn't bad at all, but I wanted to change so badly as it made room bit darker, I guess I just had enough of winter then.
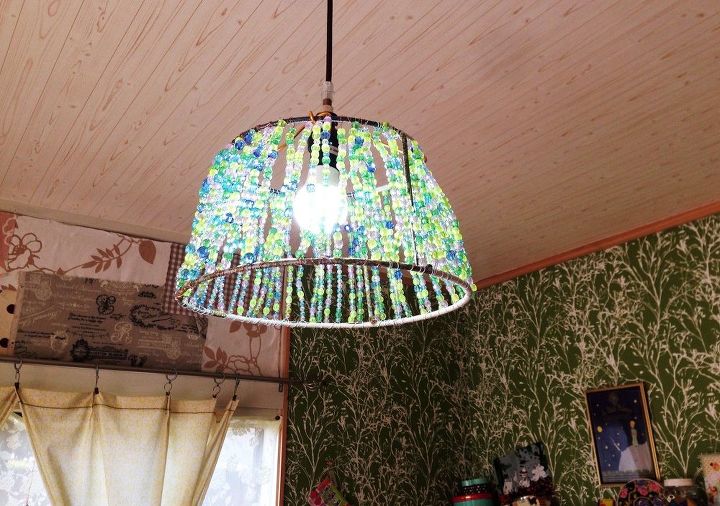
Now this room looks like welcoming early (very early) spring colors and lighter than before.
Attaching and removing is also not much trouble, so it may be good idea to make another shade in different coloring to change it in summer time.
Thank you for your time taking to read my post!
Happy Hometalking!
No comments