Faux Roses...the Paper Variety
My local supermarket is offering $5.00 off a dozen roses for Valentines, and I thought "Go for it!" and then with my next breath I said: "make your own darn flowers."
For years now, I have been dabbling in the world of paper flowers. I wanted to share my now "obsession" with creating paper flowers with my HOMETALK friends; AND I wanted to do something with a vintage vibe. So I took an old yellowing paperback and got to it.
Time: 2 Hours Cost: $5 Difficulty: Medium
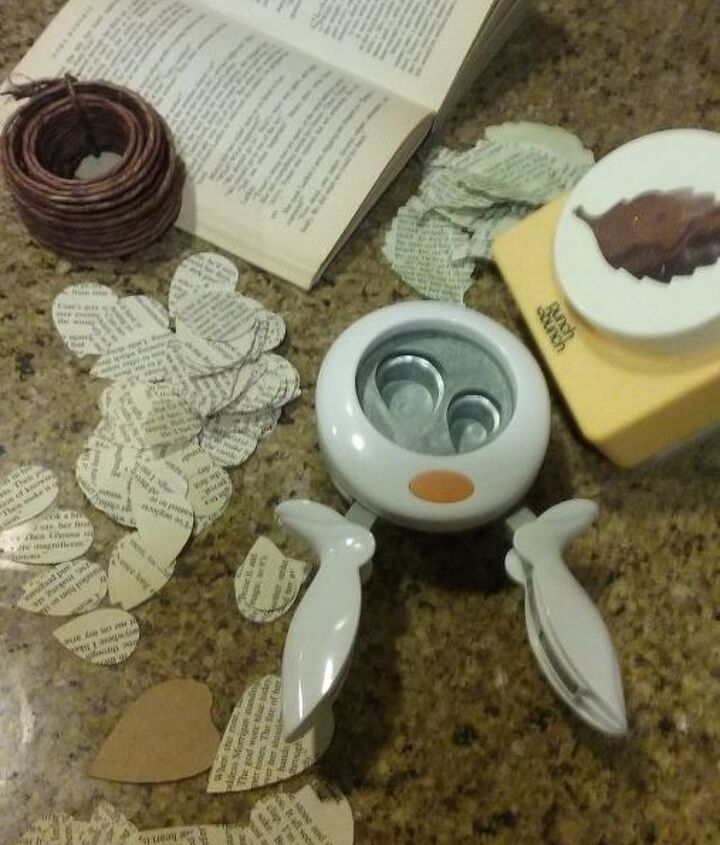
As you can see, I have several scrapbooking paper punches, that are perfect for this project. I cut a bunch of the tear drop shapes (small, medium petals) and then using the medium teardrop, I created a third pattern (large petal) I like the dimension and fullness three progressive sizes will bring to this rose.
I also, wanted a tinge of color and I have for this purpose a multicolor eyeshadow kit that I bought at the $$ store.
So using a Q tip, I rubbed some of the eyeshadow just along the top outside edges. I estimated that I would need 7 small, 7 medium and 7 large petal for each rose. So this took a bit of time; but I find it manageable if I work on one flower at a time...so I don't get bored.
I happened to have raffia wrapped wire, that I cut into 12" lengths to act as the stems, but I have actually used small branches from the garden as stems for other arrangements and I love the way that looks also.
In order to get the curved/rounded shapes of rose petals, I wrap each petal around a bamboo skewer, or the stick off the Q tip would work well also. Gently unroll and roll the top left and top right edges outward, again using the bamboo skewer or the stem of the Q tip
And begin the assembly apply very small amounts of hot glue at the point of each petal. Starting with the smallest to the large, staggering the petals so they slightly over lap, moving in a clockwise direction, until all the petals are hot glued to the stem.
As you can see from this photo, I added leaves. I drew veins with a fine line green marker. Added additional color with some watered down acrylic green paint.
In order to give the leaves some dimension, I added green floral wire to the back along the center vein, this does two things, #1 it gives you the ability to bend the leaf to give it a more natural appearance, and
#2 the excess wire is used to attach the leaf to the stem of the rose.
I grouped three leaves together, twisted the excess wire and attached the leaves to the stem. Shaped them to look as close to real rose leaves.
It takes time to create these beautiful flowers, but for the cost of time, I was able to create my own valentine bouquet.
I hope you enjoy it. Happy crafting everyone!
Materials used for this project:
- Paperback (had on hand)
- Paper punches (had on hand; but originally from Michaels)
- Raffia wrapped floral wire (Michaels)
- Green floral wire (Michaels)
- Hot glue sticks ($$ store)


No comments